MySQL Database Server Recovery
XLServer provides an automated way to restore and recover MySQL database servers in case of failure.
You can use it to recover from:
- Media failure (e.g., corrupted or accidentally deleted datafiles)
- Logical errors (e.g., a user deleting or modifying data by mistake)
Recovery can be performed as:
- Complete Database Server Restore → up to last available transaction
- Point-in-Time Restore (PITR) → up to a specific snapshot LSN
- Partial Restore → recover a specific database or table
MySQL recovery can be executed either from the web console or using the REST API.
⚙️ Prerequisites
Before starting a recovery, make sure that:
- XLServer has SSH access to the source database server
- The Live Database Server is already linked in XLServer
- At least one recoverable snapshot exists
- For whole server restore, the source database server must be down
💡 You can also mount any snapshot from XLServer into the source database environment and manually perform the recovery if desired.
🔄 Recovery Workflow in XLServer
To recover a MySQL Database Server:
-
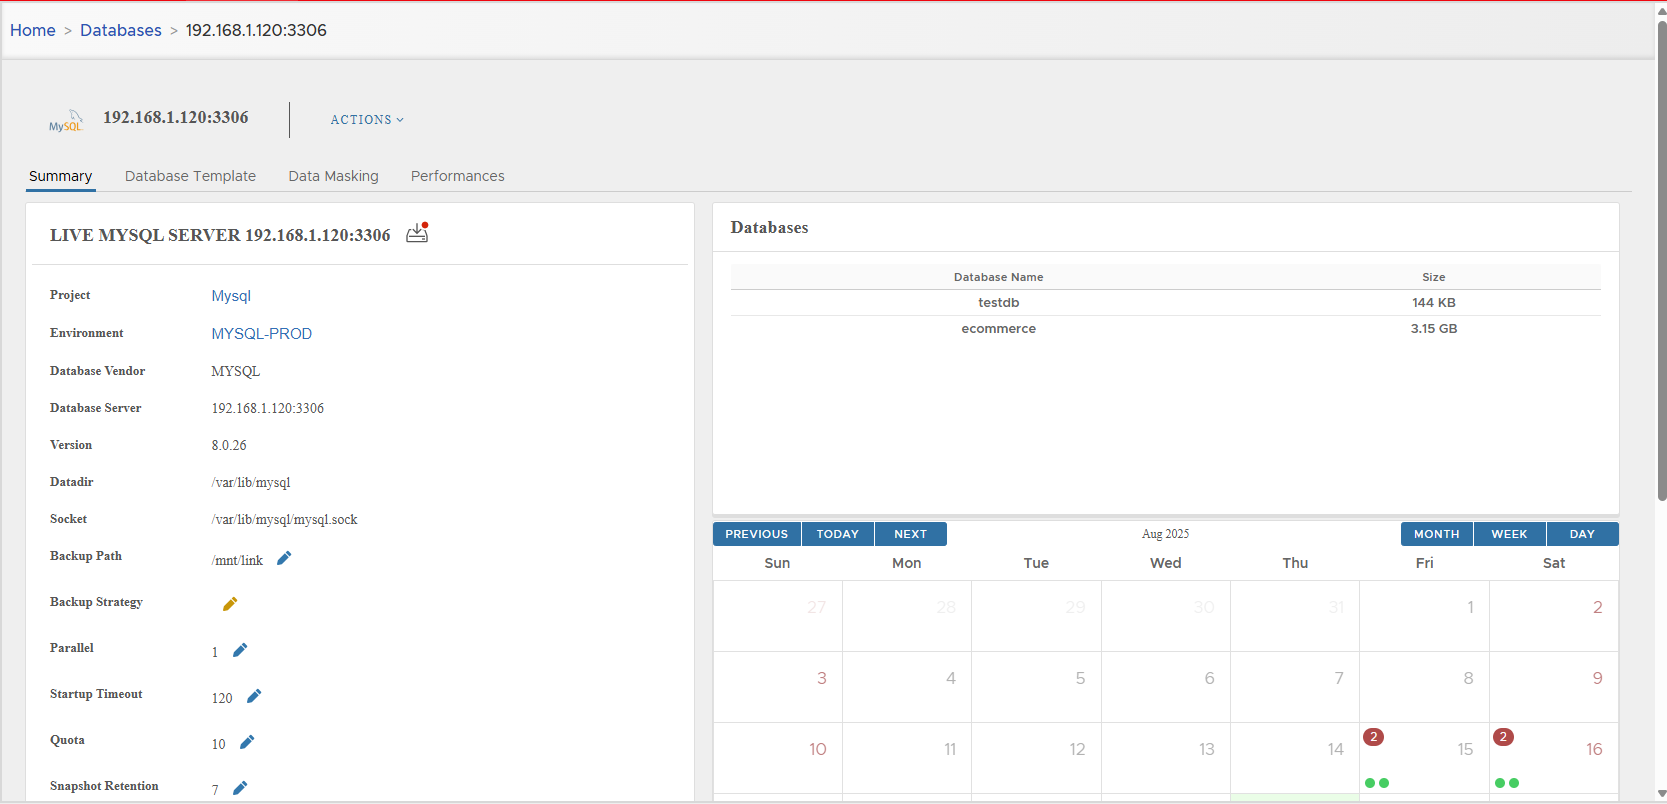
Navigate to Live Server Detail Page
-
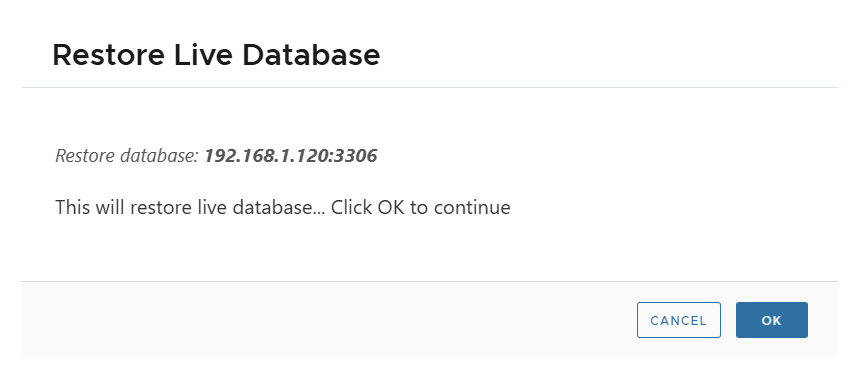
From Actions, select Restore
-
Confirm the restore action
-
The Restore Database dialog appears
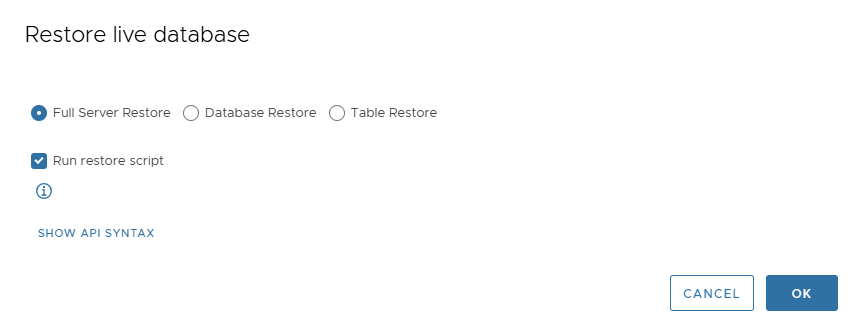
Available Restore Options
From this page, choose:
- Full Server Restore → restore the entire MySQL instance
- Database Restore → restore a single database
- Table Restore → restore a single table
Additional option:
- Run Restore Script →
- If checked, XLServer runs the full automated recovery procedure
- If unchecked, XLServer only mounts the snapshot and generates scripts for manual execution
🗃️ Restore Whole MySQL Database Server
Steps:
- Select Full Server Restore
- Choose whether to enable Run Restore Script
- Click OK to start recovery
During recovery:
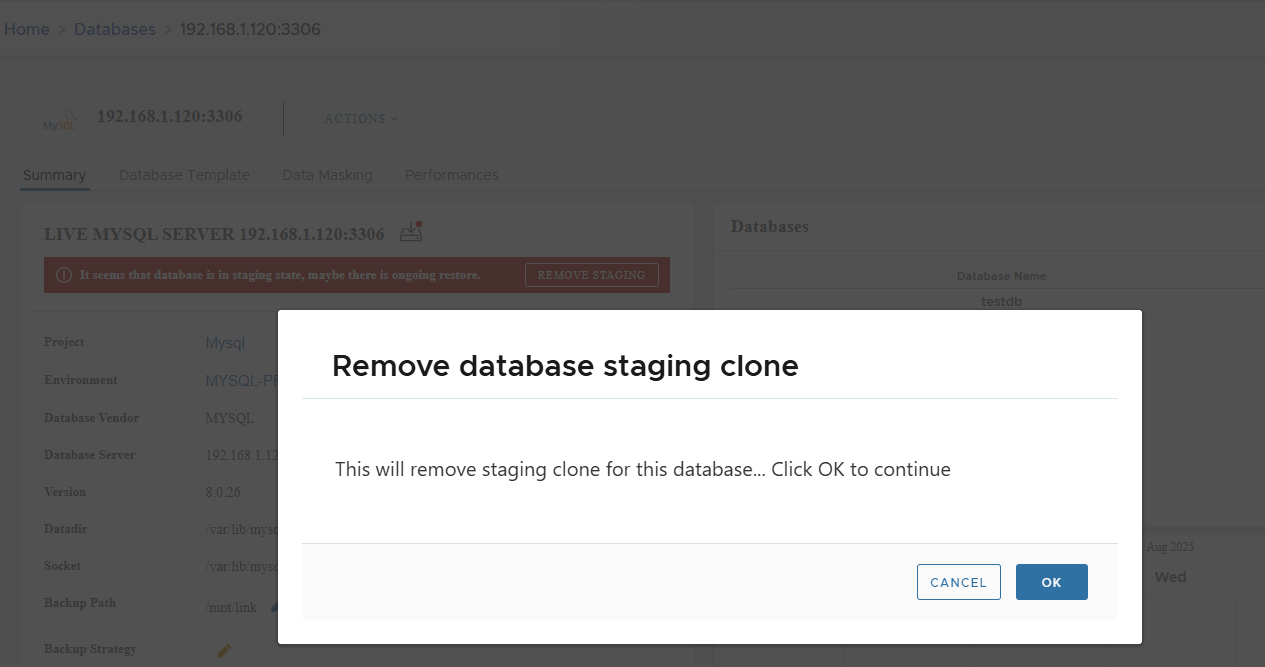
-
A staging clone is created and attached to the Live Database Server
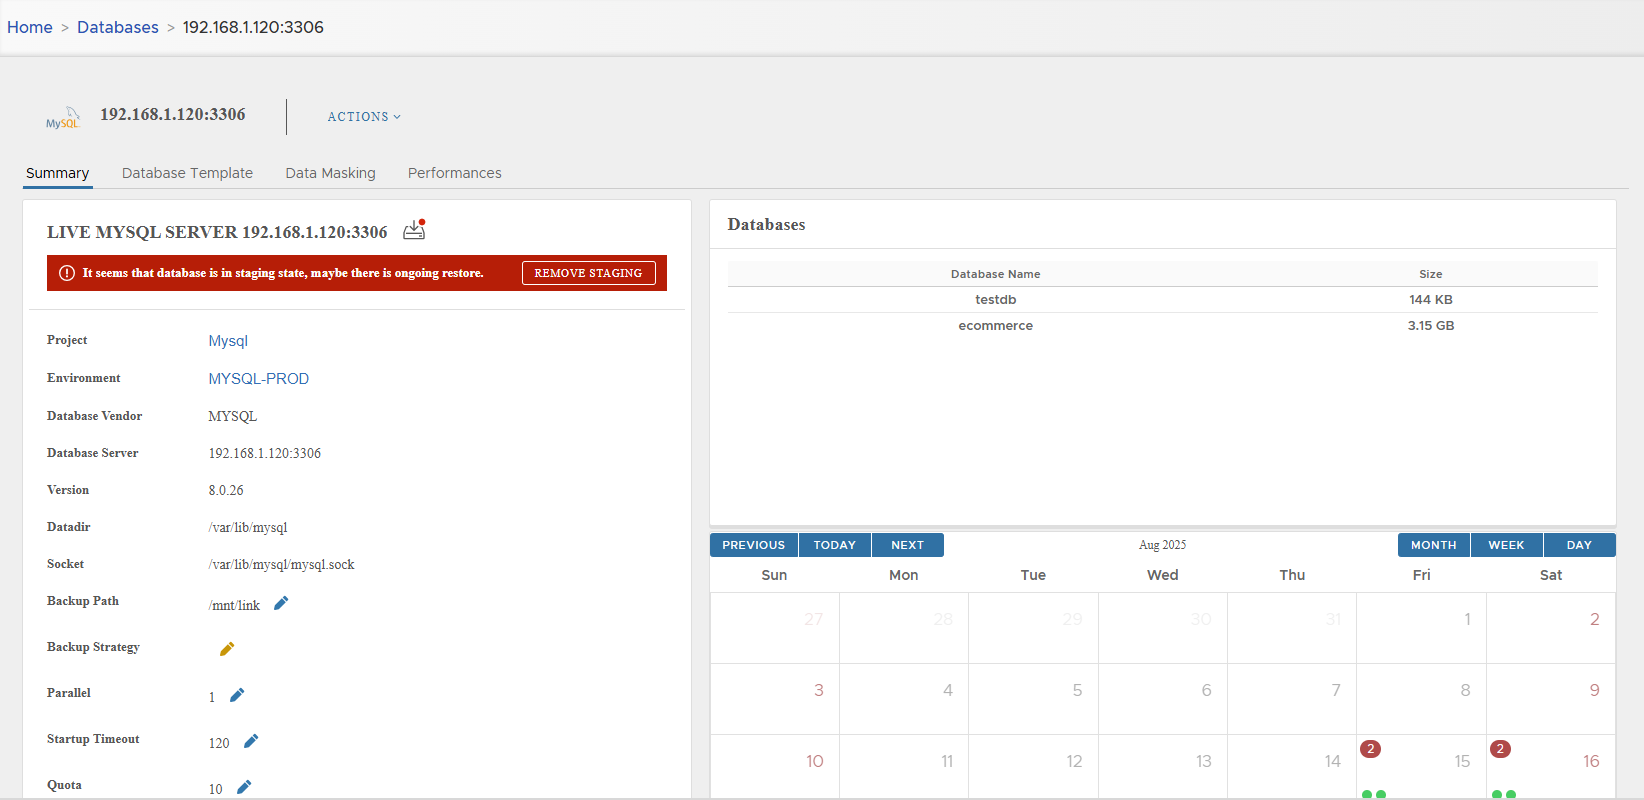
-
While staging exists:
- No snapshots can be created
- No other actions are allowed
-
Staging clone is automatically removed if “Run Restore Script” was enabled.
-
Otherwise, you must manually remove it after recovery.
To remove staging clone:
- Click Remove Staging
- Confirm
⚠️ Note: For whole server restore, the database server must be shut down.
- When the whole database server is restored, you must relink this server in XLServer
- All previous snapshots will be marked as obsolete
🏷️ Restore a Single Database
To restore one database:
- Select Database Restore from Restore Live Database page
- From Database dropdown, choose the desired database
- Keep Run Restore Script checked for automated recovery, or uncheck for manual restore
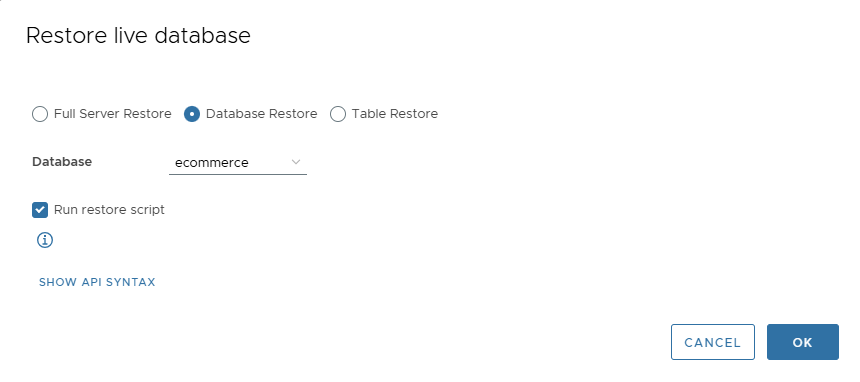
- Click OK to start restore
📂 Restore a Table
To restore one table:
- Select Table Restore from Restore Live Database page
- From Database dropdown, select the parent database
- From Table Name dropdown, select the target table
- Keep Run Restore Script checked for automated recovery, or uncheck for manual restore
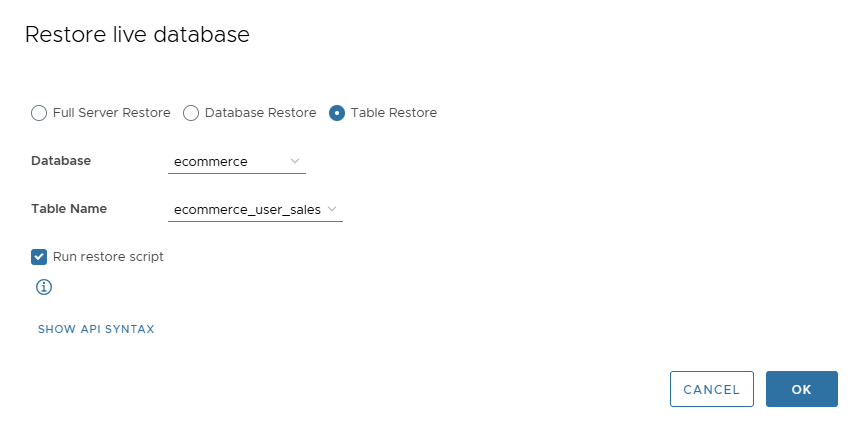
- Click OK to start restore
📦 Mount Live Database Snapshot
Snapshots can be mounted for inspection or manual recovery.
Mount Last Snapshot
- Go to Live Database Server Detail Page → Actions > Mount Snapshot
- Confirm action
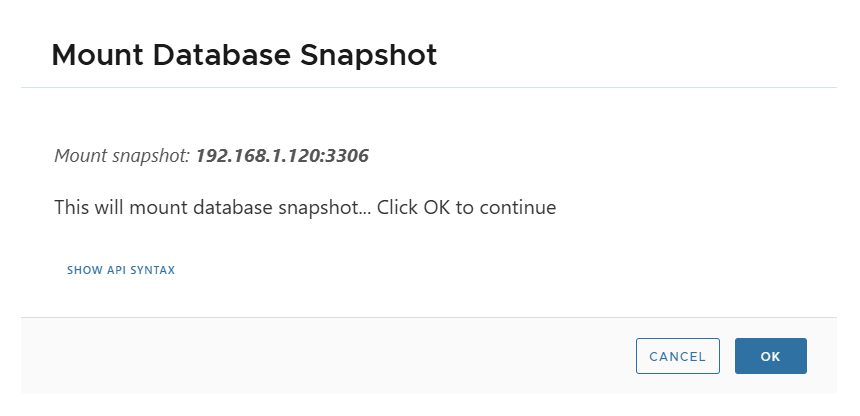
- Database server enters STAGING state
Mount Specific Snapshot
- Go to Snapshot Detail Page → Actions > Mount Snapshot
- Confirm action

- Database server again enters STAGING state
You can at any time remove the staging clone by clicking on Remove Staging.
✅ Summary
- Supports full server, single database, and single table restore
- Recovery can be automatic (orchestrated by XLServer) or manual (mount + scripts)
- A staging clone is always used during recovery, and must be removed once done
- Snapshots can be mounted for inspection, recovery, or retrieving data
- After full restore, the server must be relinked in XLServer