Oracle Database Recovery
XLServer provides a simple and automated way to restore and recover Oracle databases in case of failures.
Recovery can be performed for both media failures (e.g., corrupted or deleted datafiles) and logical errors (e.g., user mistakenly deleting or modifying data).
Recovery can be:
- Complete Recovery (recover up to the last available transaction before outage)
- Point-in-Time Recovery (PITR) (recover up to a specific SCN or snapshot)
- Whole database restore
- Partial restore (specific PDB, tablespace, or datafile)
XLServer offers two recovery modes:
- Fast Recovery → Switch to snapshot image copy (very fast).
- Classical Restore and Recover → Restore datafiles and recover them with RMAN.
Recovery operations can be initiated from the web console or through REST API.
⚙️ Prerequisites
Before performing a recovery:
- XLServer must have SSH access to the source database server.
- The Live Database must already be linked in XLServer.
- At least one recoverable snapshot must exist.
- For whole database restore, the source database must be shut down.
In case of manual recovery, you can mount any snapshot to the source environment and use its contents (datafiles and archivelogs) directly.
🔄 Oracle Database Recovery Types
XLServer supports two major recovery types:
1. Complete Recovery
- Restores the database and rolls forward until the last transaction before outage.
- Requires all archivelogs generated after the last snapshot to be available locally.
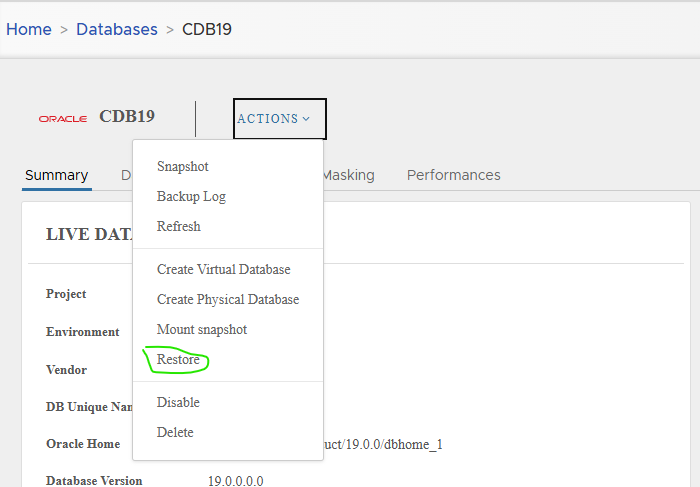
- Initiated via Actions > Restore from the Live Database menu.
2. Point-in-Time Recovery (PITR)
- Recovers database to a past state (specific snapshot or SCN).
- Useful in case of logical corruption or accidental DML/DDL changes.
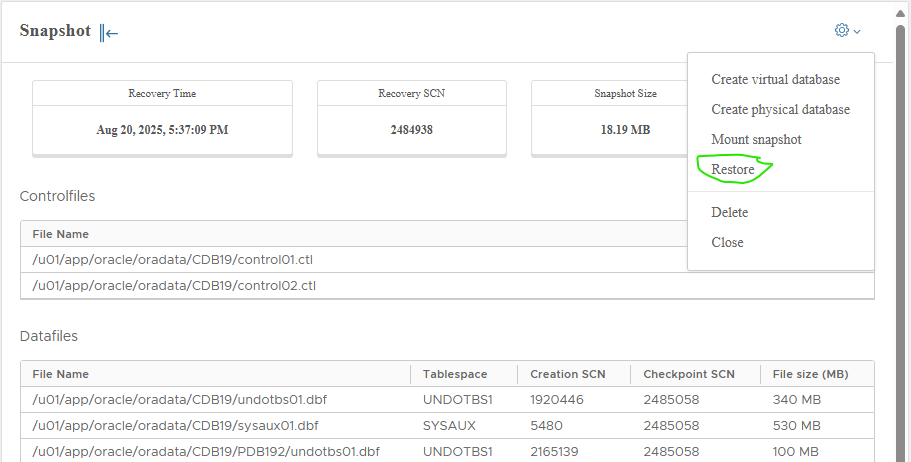
- Initiated from a specific snapshot via Actions > Restore.
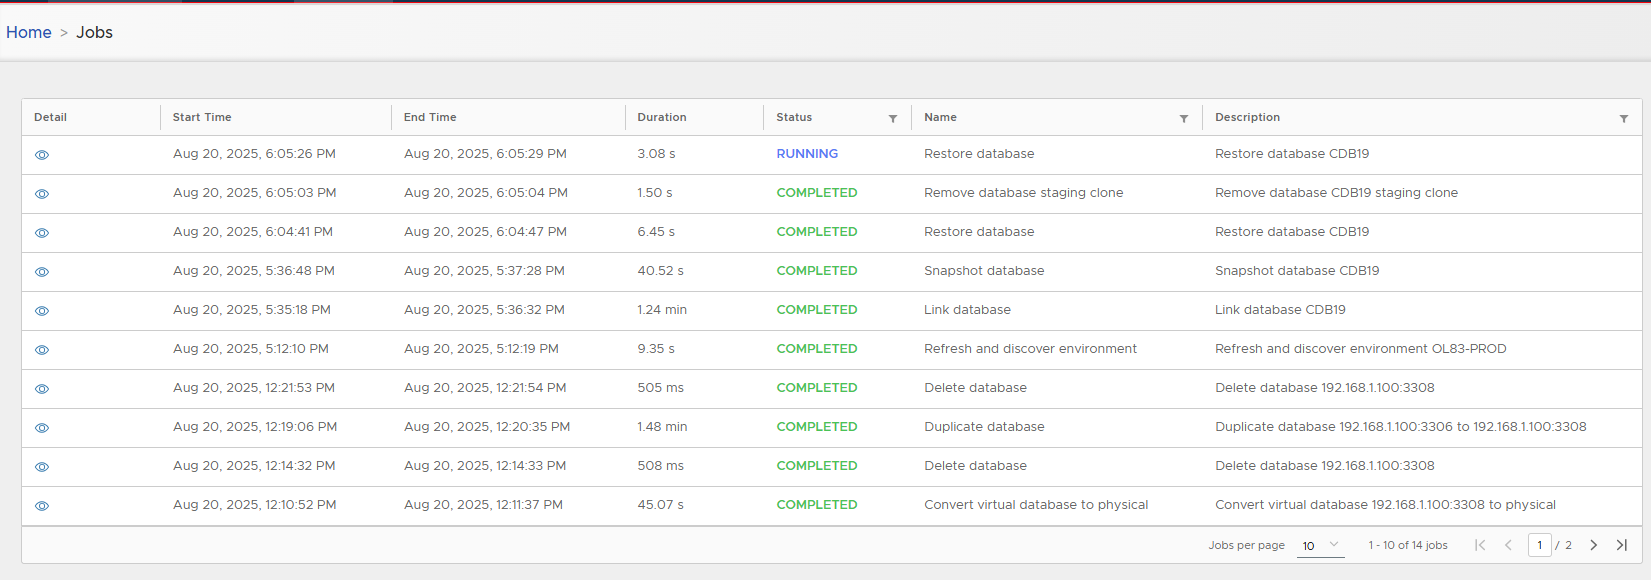
🖥️ Recovery Workflow in XLServer
To initiate recovery:
-
Navigate to Live Database Detail Page.
-
From Actions, select Restore.
-
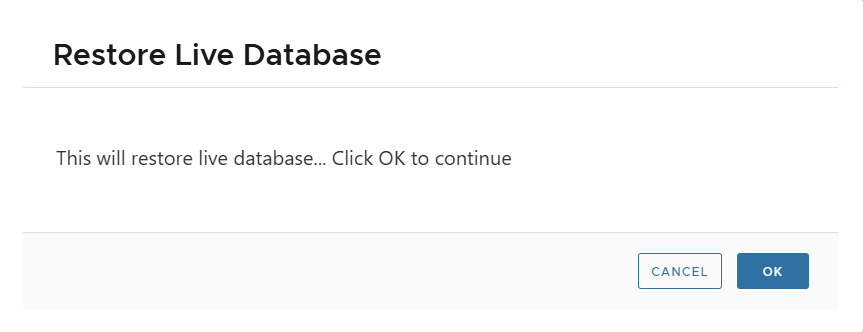
Confirm the restore operation.
-
The Restore Database dialog appears.

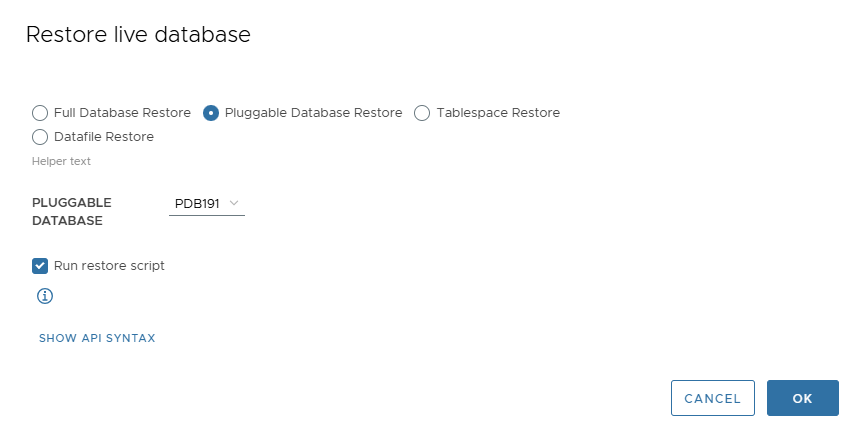
Restore Options
From this page, choose:
- Full Database Restore
- Pluggable Database Restore (CDB/PDB)
- Tablespace Restore
- Datafile Restore
Additional options:
- Fast Recovery → Uses switch to copy to instantly switch to snapshot datafiles.
- Classical Restore → Restores datafiles to original location, recovery time depends on DB size.
- Run Restore Script → If enabled, XLServer orchestrates full restore + recovery.
If disabled, only snapshot mount and script generation are done (manual execution required).
🗃️ Restore Whole Database
Steps:
- Select Full Database Restore.
- Choose whether to enable Fast Recovery.
- Fast: uses image copy, recovery in seconds.
- Classical: copy files to original location, slower.
- Enable Run Restore Script for automated recovery.
- Click OK to start.
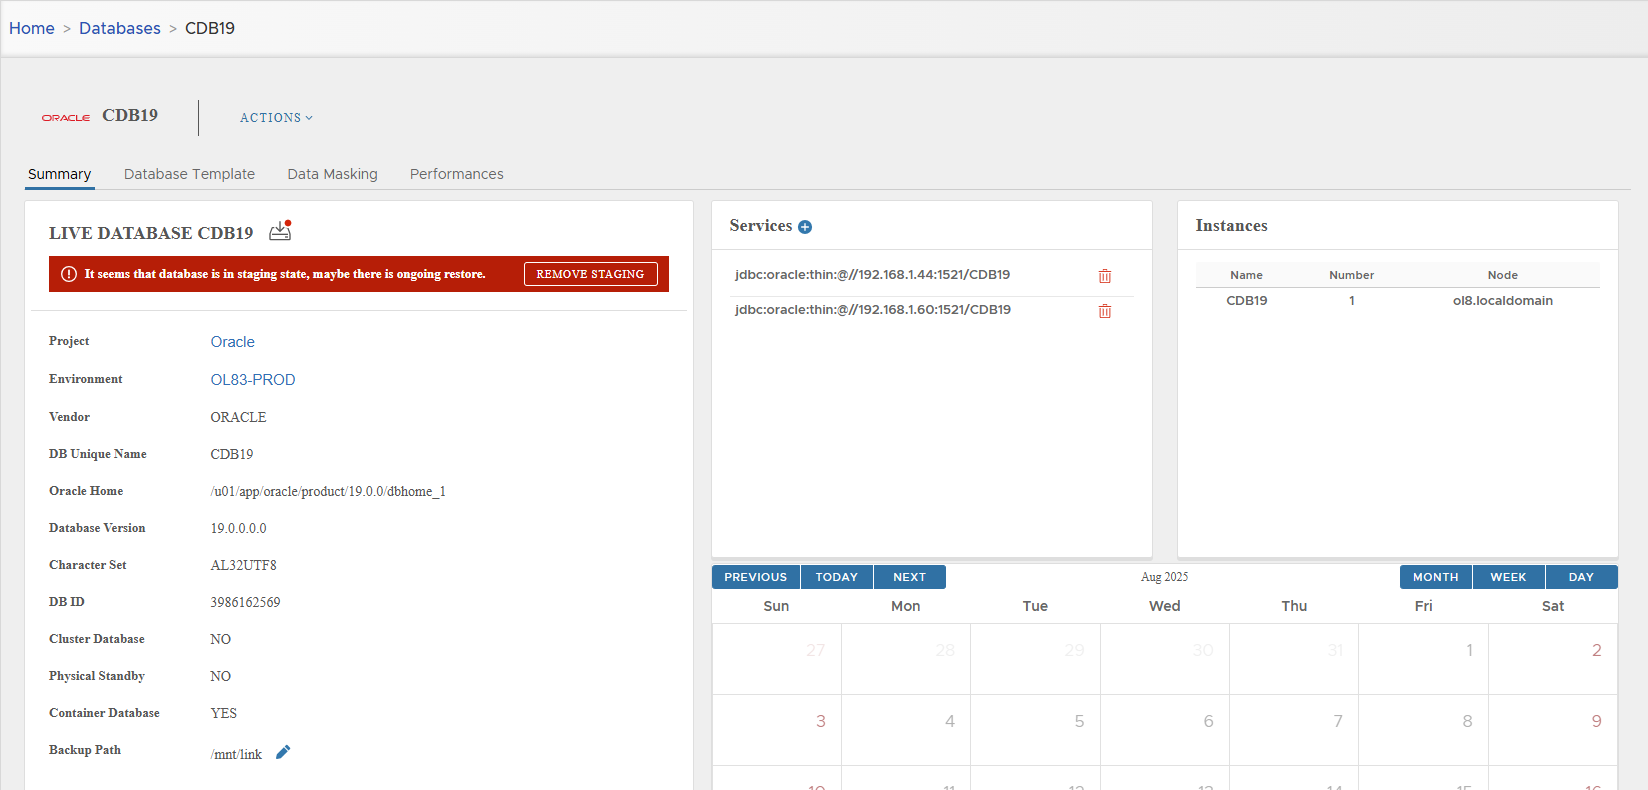
Staging Clone During Recovery
- Recovery creates a staging clone attached to the Live Database.
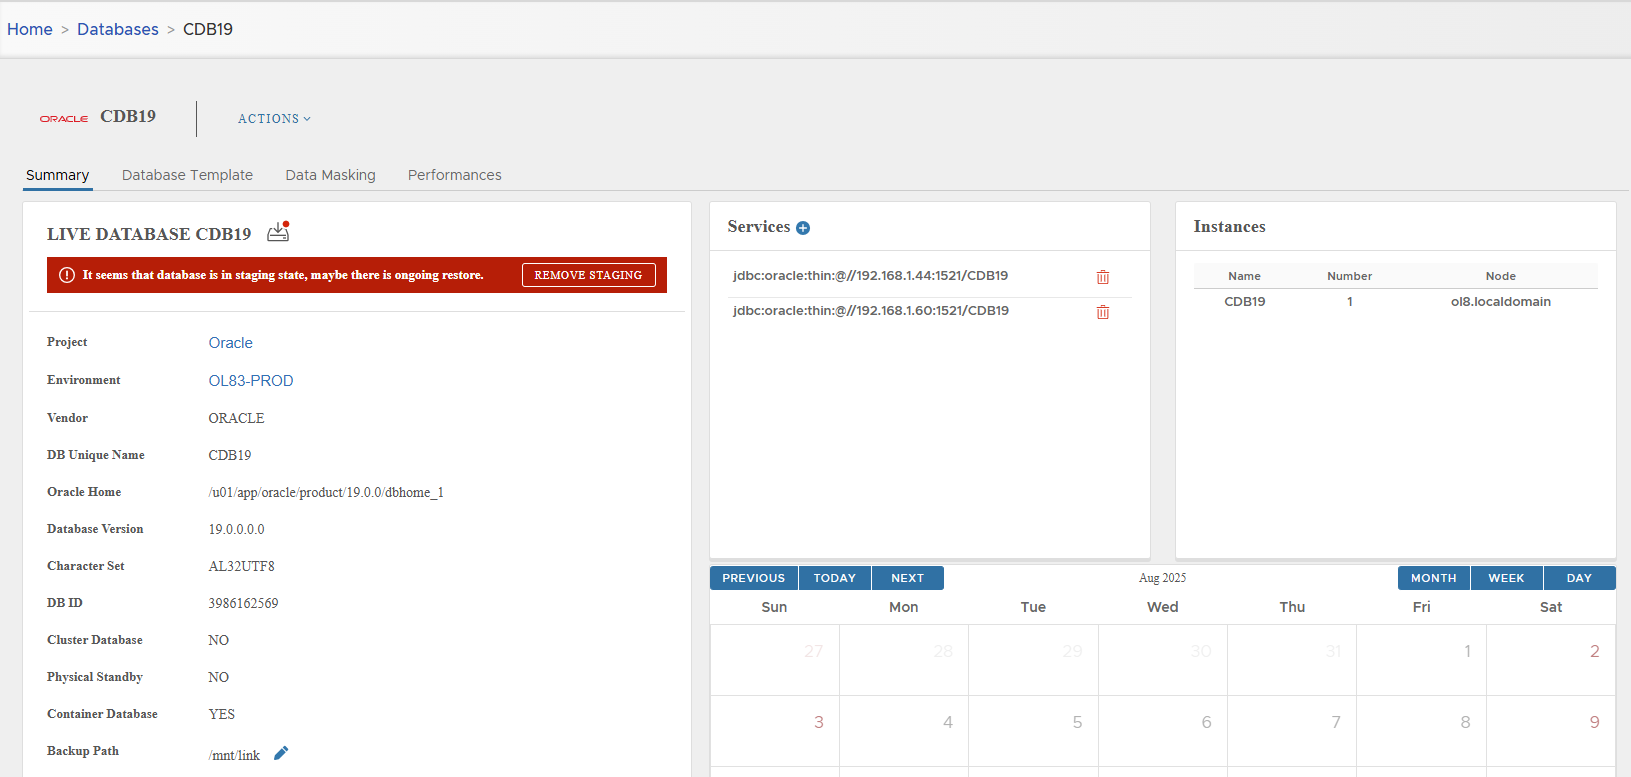
- While staging exists:
- No snapshots can be created.
- No other actions are allowed.
- Staging is automatically removed if “Run Restore Script” was enabled.
- Otherwise, remove manually via Remove Staging.
⚠️ Note: For full restore, the database must be down (not open).
🏷️ Restore Pluggable Database (PDB)
- Select Pluggable Database Restore.
- From the dropdown, select target PDB.
- Keep Run Restore Script checked for automation, or uncheck to run manually.
- Click OK.
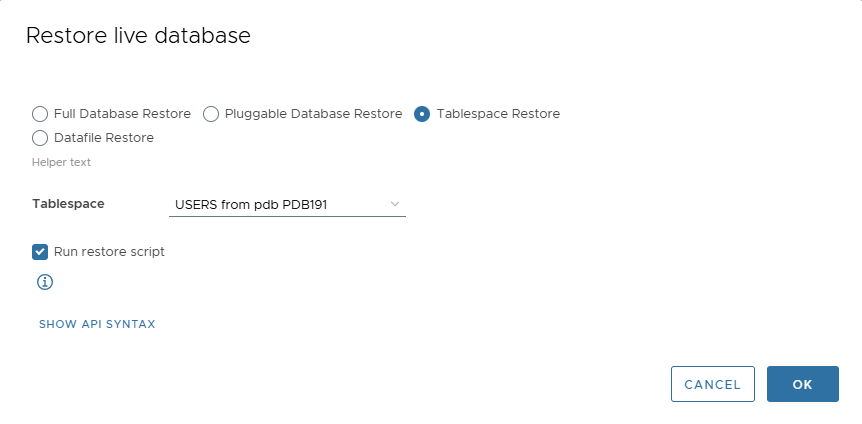
📂 Restore Tablespace
- Select Tablespace Restore.
- Choose the desired tablespace from the dropdown.
- Decide whether to auto-run restore script.
- Click OK.
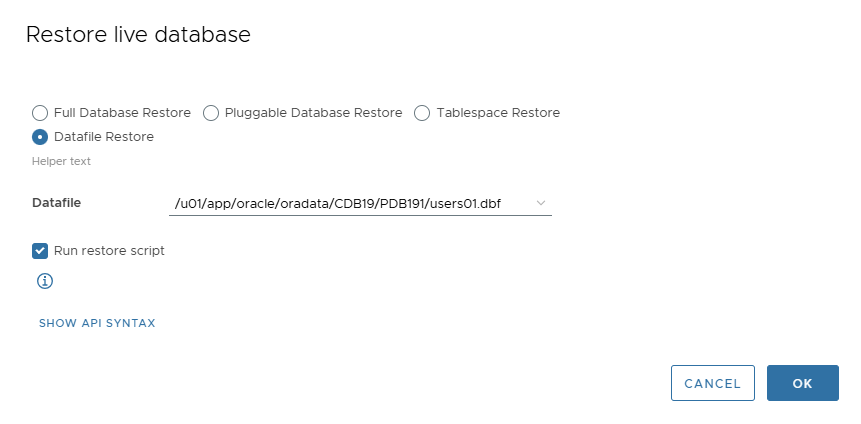
📑 Restore Datafile
- Select Datafile Restore.
- Choose the desired datafile from the dropdown.
- Decide whether to auto-run restore script.
- Click OK.
📦 Mount Live Database Snapshot
Snapshots can be mounted to inspect backups, retrieve archivelogs, or perform manual recovery.
Mount Last Snapshot
- From Live Database page → Actions > Mount Snapshot.
- Confirm.
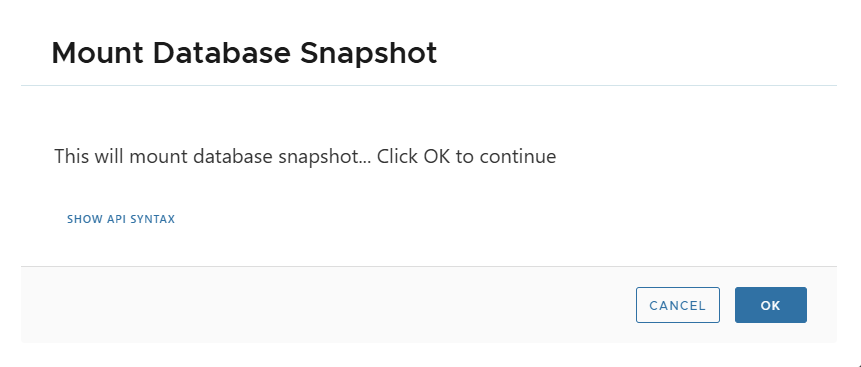
- The database enters STAGING state.
Mount Specific Snapshot
- Navigate to Snapshot Detail Page.
- From Actions, select Mount Snapshot.

- Database enters STAGING state until staging clone is removed.
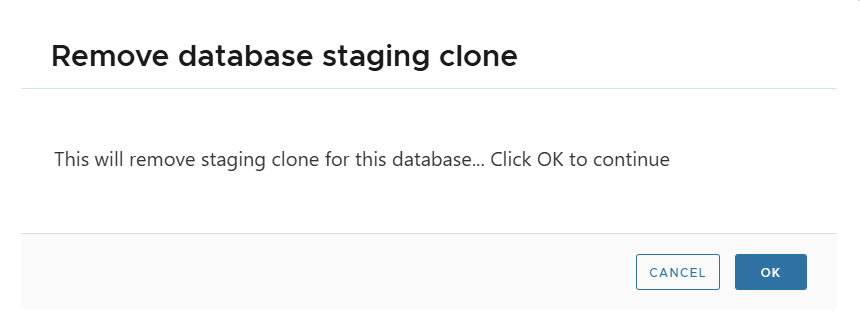
📝 While staging is active, no actions are allowed on the Live Database.
Use Remove Staging to clean up when done.
✅ Summary
- Complete Recovery: Recovers until last available transaction, requires archivelogs.
- PITR: Recovers to a specific snapshot or SCN.
- Supports Full DB, PDB, Tablespace, Datafile restore.
- Fast recovery is extremely quick, while classical restore is size-dependent.
- Snapshots can be mounted for inspection, manual recovery, or archivelog retrieval.
- XLServer automates recovery, but also provides scripts for manual execution when required.