Oracle Database Cloning
XLServer allows you to provision Oracle cloned databases for development, testing, QA, troubleshooting, or parallel workloads.
Two clone types are supported:
- Virtual Clone: Lightweight clone using snapshots (no data duplication, minimal disk space).
- Physical Clone: Full copy of the source database (block-to-block duplication).
When a backup strategy is attached to a live database, snapshots of the live database are created at regular intervals.
From the Live Database detail page, you can create either a Virtual Clone or a Physical Clone using the latest snapshot (default).
Alternatively, from a Snapshot detail page, you can create a clone specifically from that snapshot content.
⚙️ Prerequisites
To create Oracle clones from XLServer:
- Oracle database is reachable from XLServer.
- Target environment must be already added to XLServer.
- XLServer must have SSH access to the target host.
- Target environment must have Oracle RDBMS installed and listener running.
- Target environment must be compatible with source environment:
- Same Linux architecture.
- Same distribution and major version.
- Target Oracle RDBMS must be equal to or higher than source RDBMS version.
- Database hosts must have NFS client installed.
🌀 Clone Types
Virtual Clone
- Created instantly from snapshots.
- Uses minimal disk space (ZFS snapshot rollback).
- Can be reset, shared, converted to physical, stopped, or started.
Physical Clone
- Full copy of live database (all data duplicated).
- Takes longer to create.
- No advanced actions (reset/share).
- Managed like an independent database.
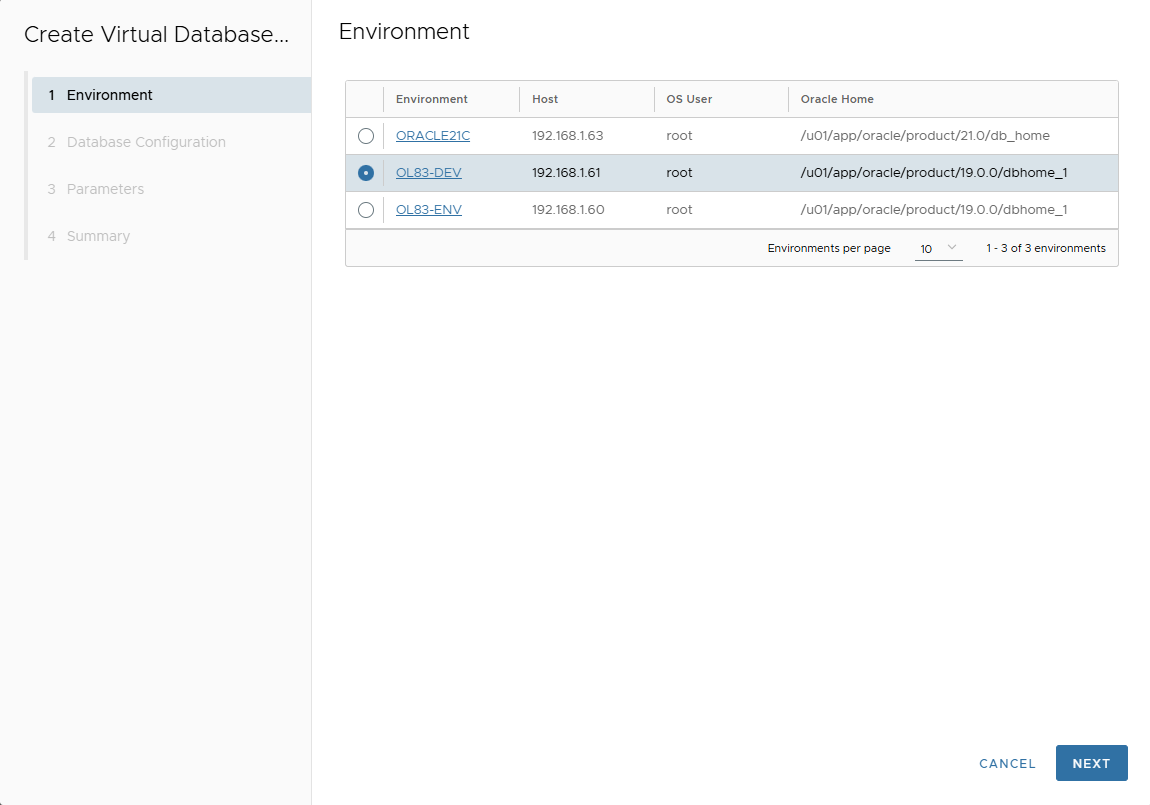
🌐 Create Oracle Virtual Clone
-
Go to Oracle database detail page.
-
Click Actions > Create Virtual Clone → Confirm.
-
The Cloning wizard is displayed.
-
Select the target environment → Next.
-
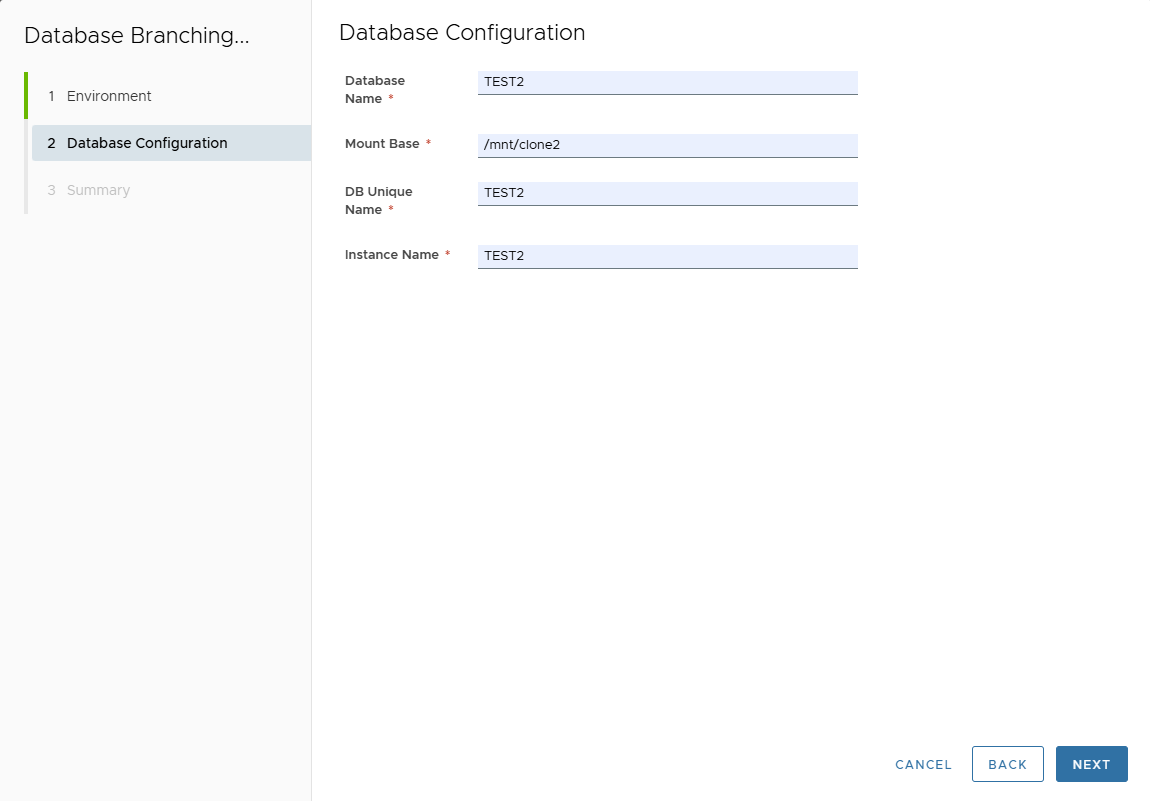
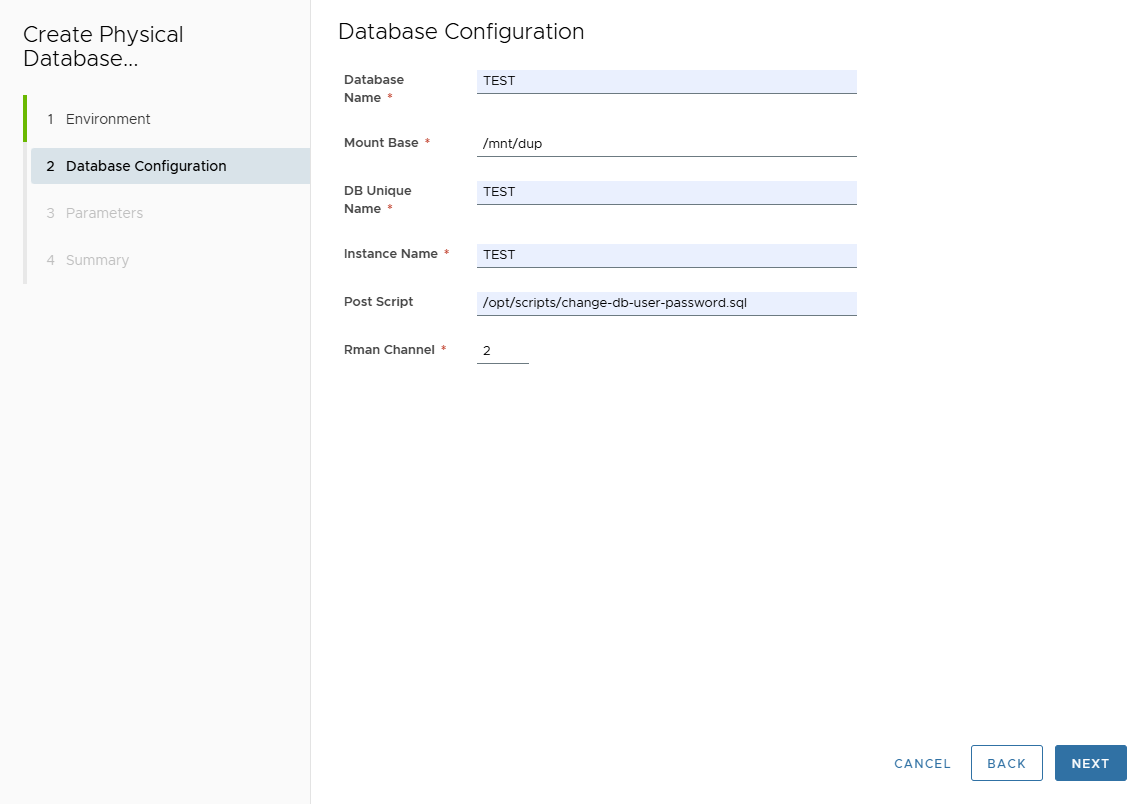
On Database Configuration page, enter:
- Database Name (target DB name).
- Mount Base (NFS mount point).
- DB Unique Name (default: same as Database Name).
- Instance Name (default: same as Database Name).
- Post Script path (optional SQL script to run after clone creation).
- RMAN Channels (used for parallel restore when converting to physical).
Ignored for Oracle Standard Edition.
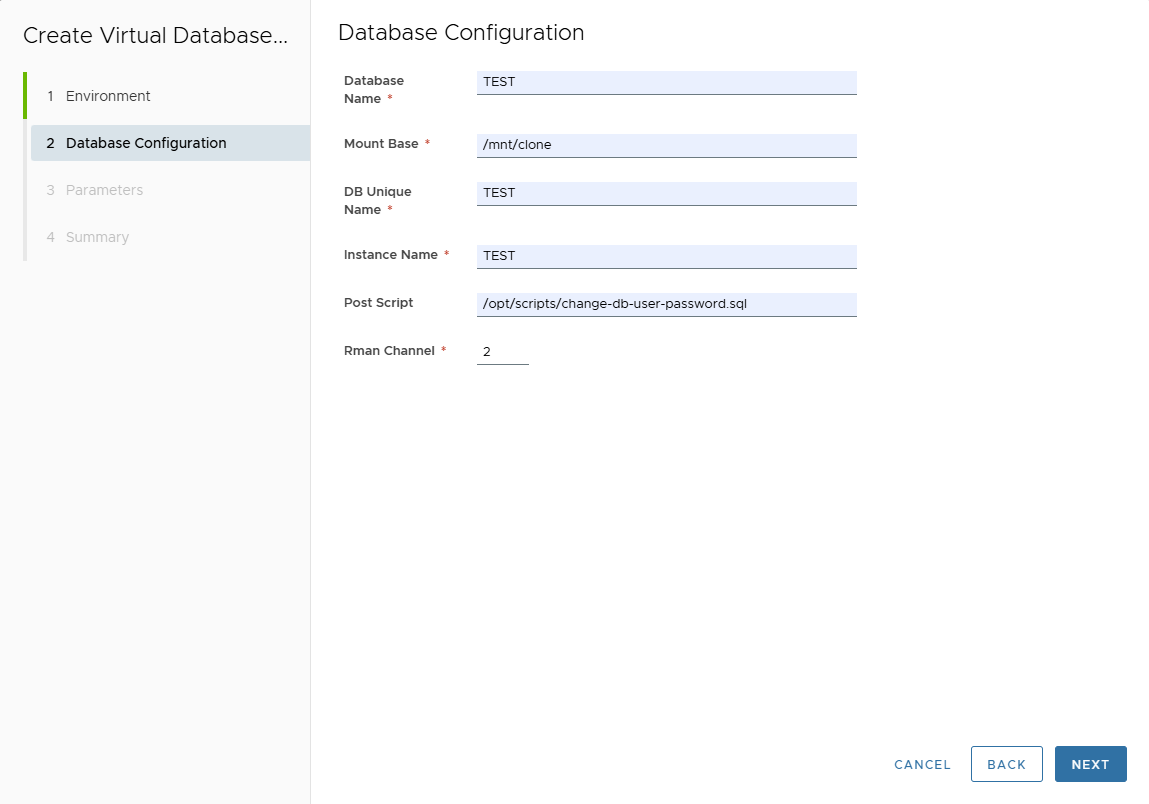
Click Next.
-
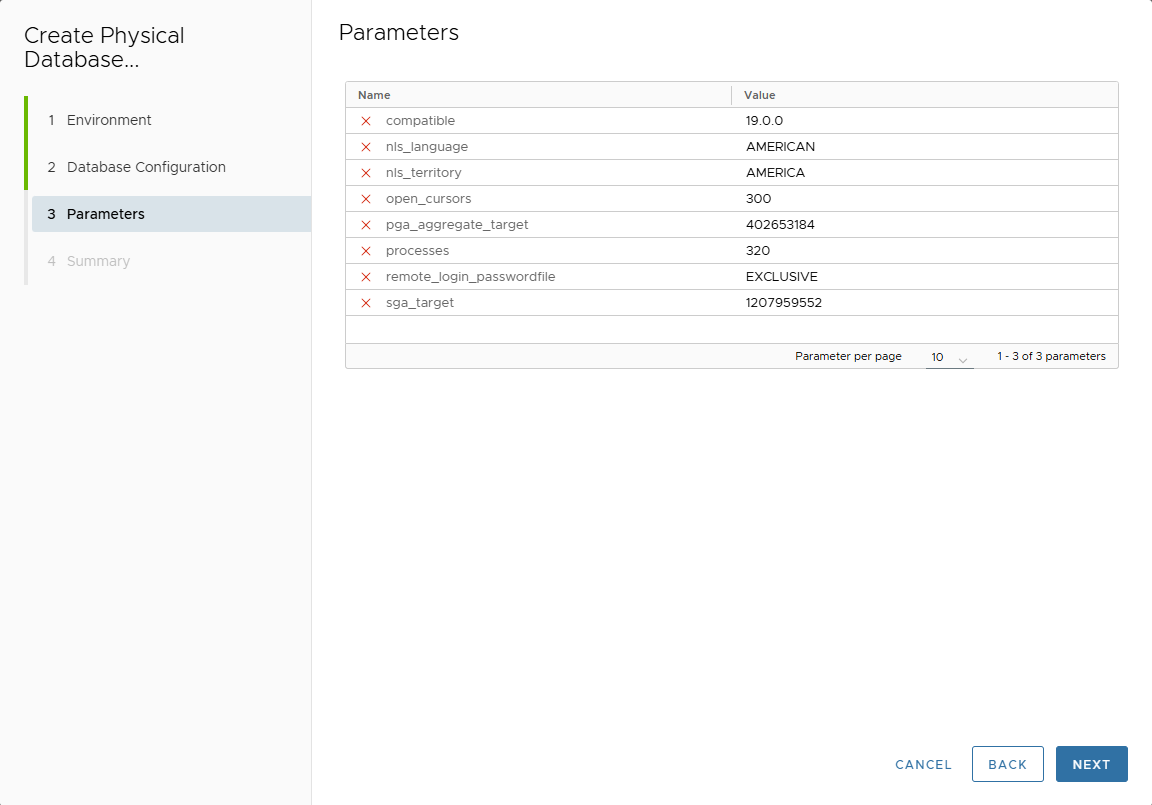
In Parameters page, customize clone DB parameters.
Parameters are inherited from template (if attached) or source database.
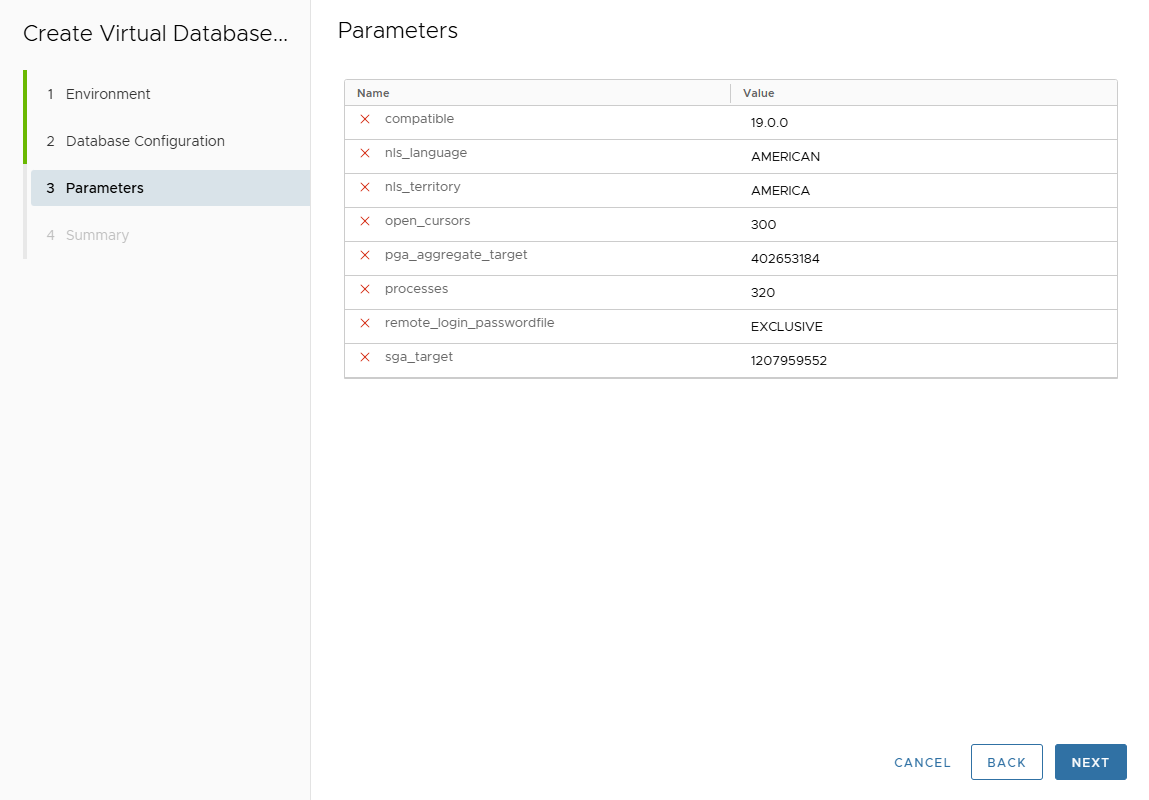
Click Next.
-
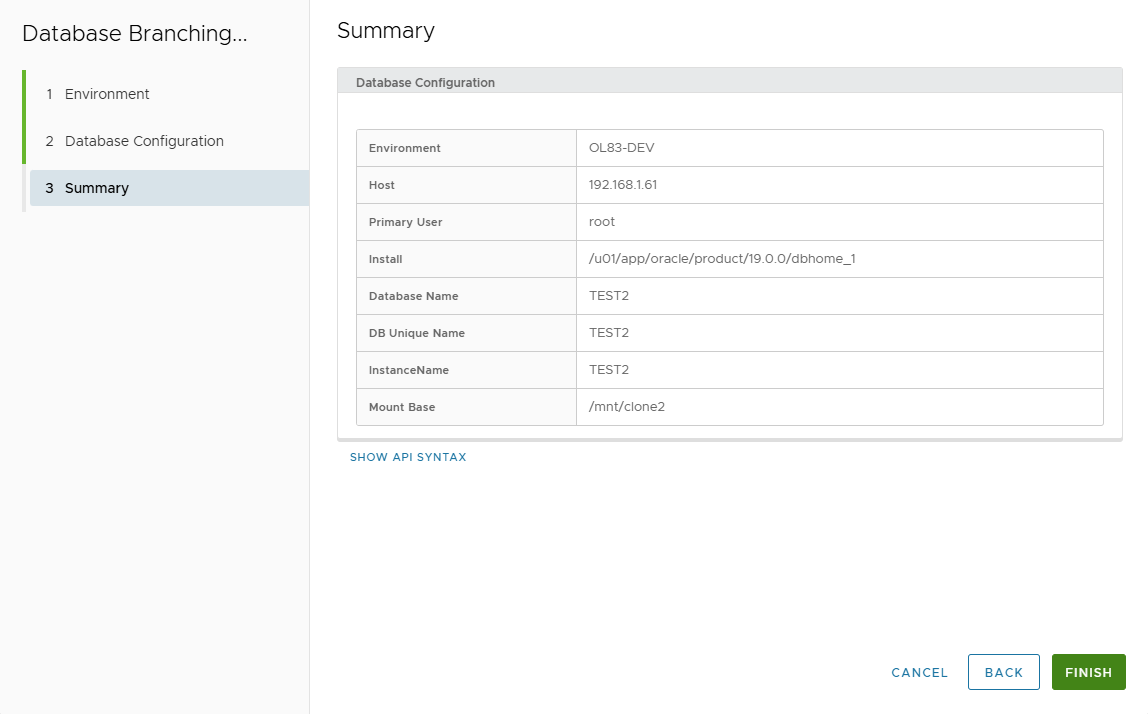
Summary page displays entered values.
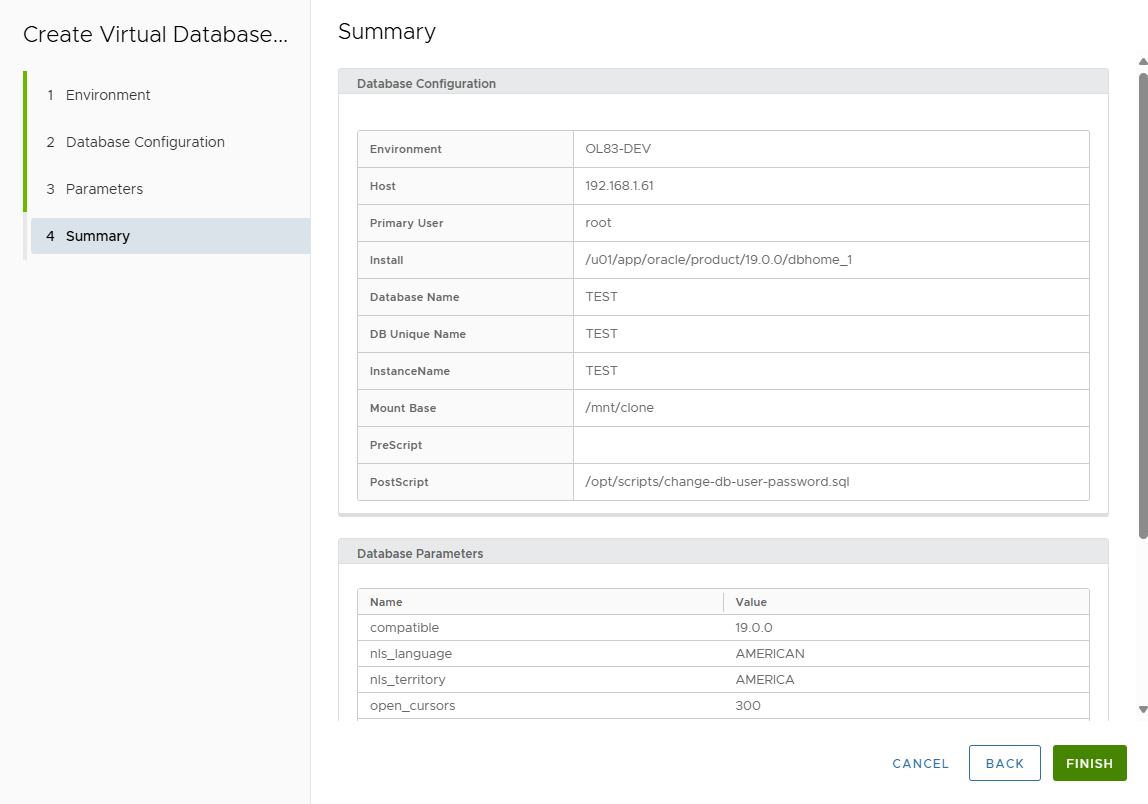
-
Review and click FINISH.
-
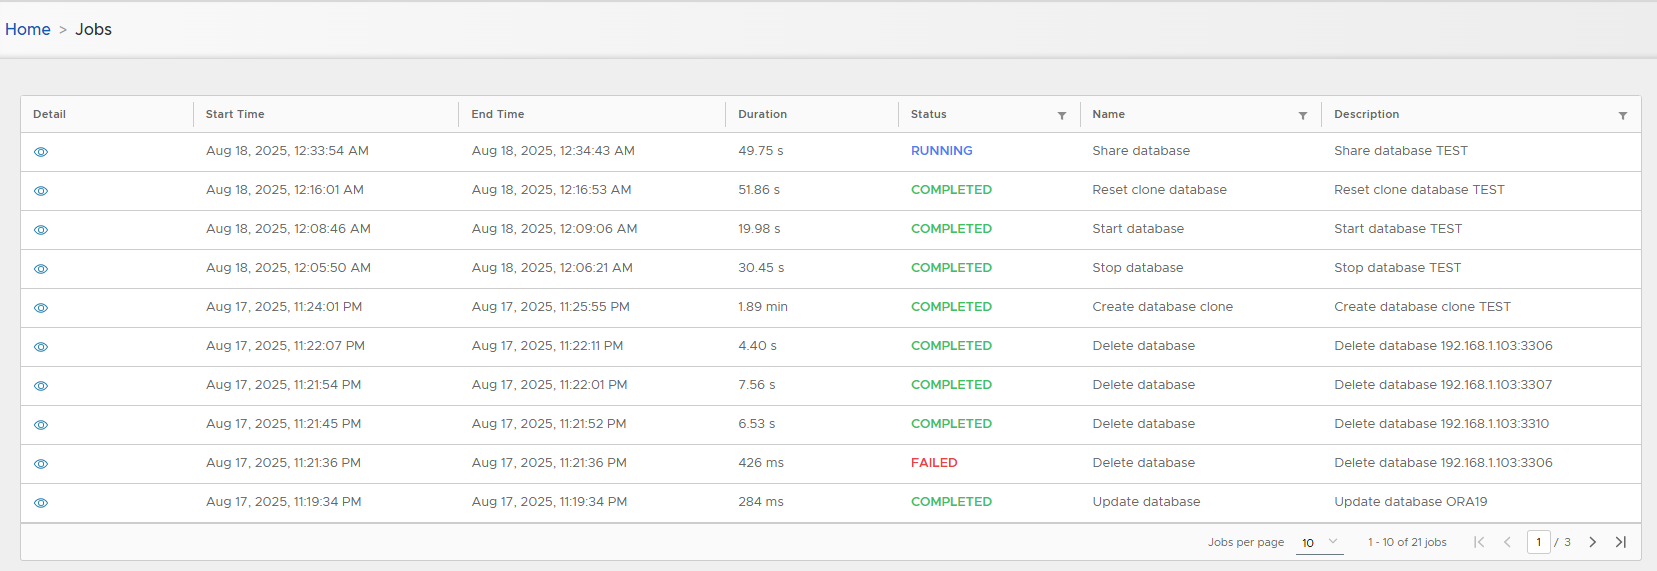
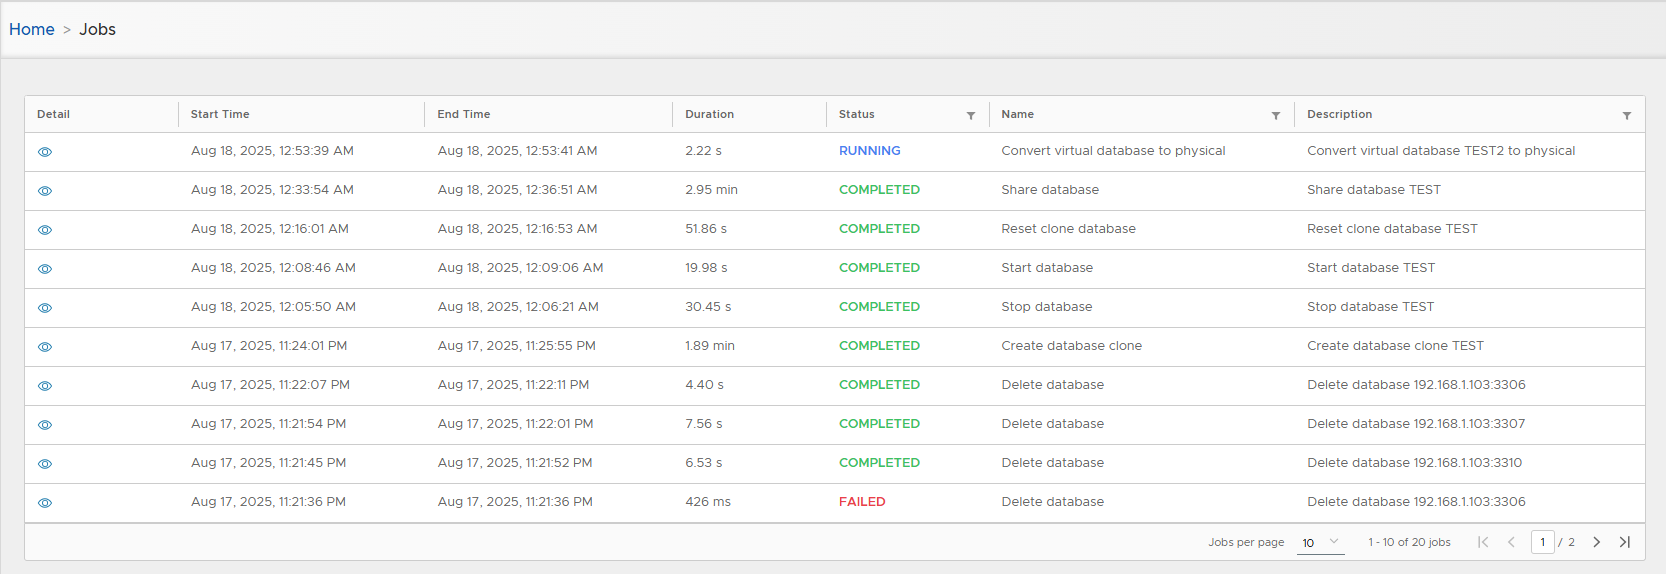
Follow execution in Jobs list.
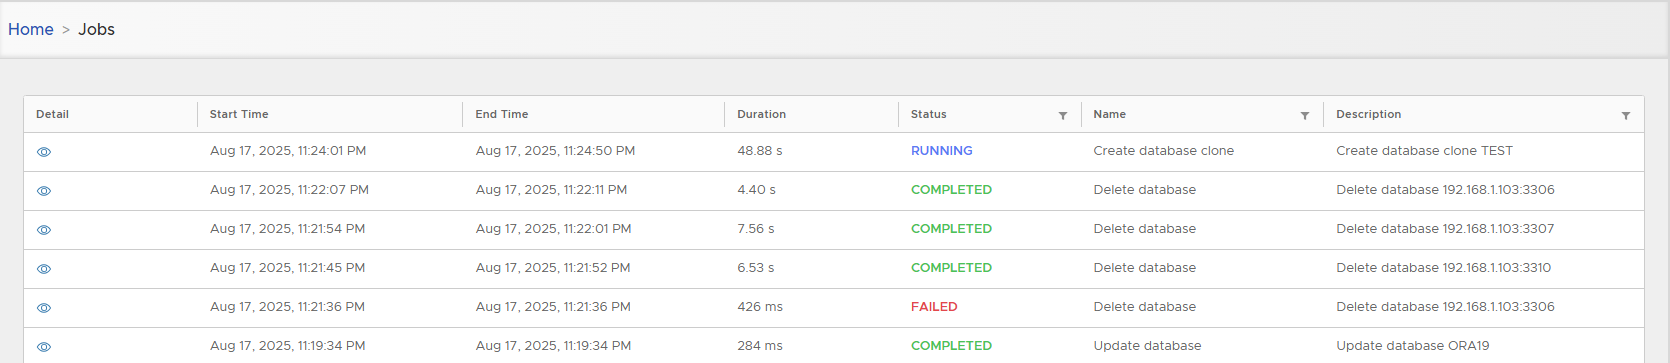
As no masking/upgrade is applied, clone creation is usually few seconds.
-
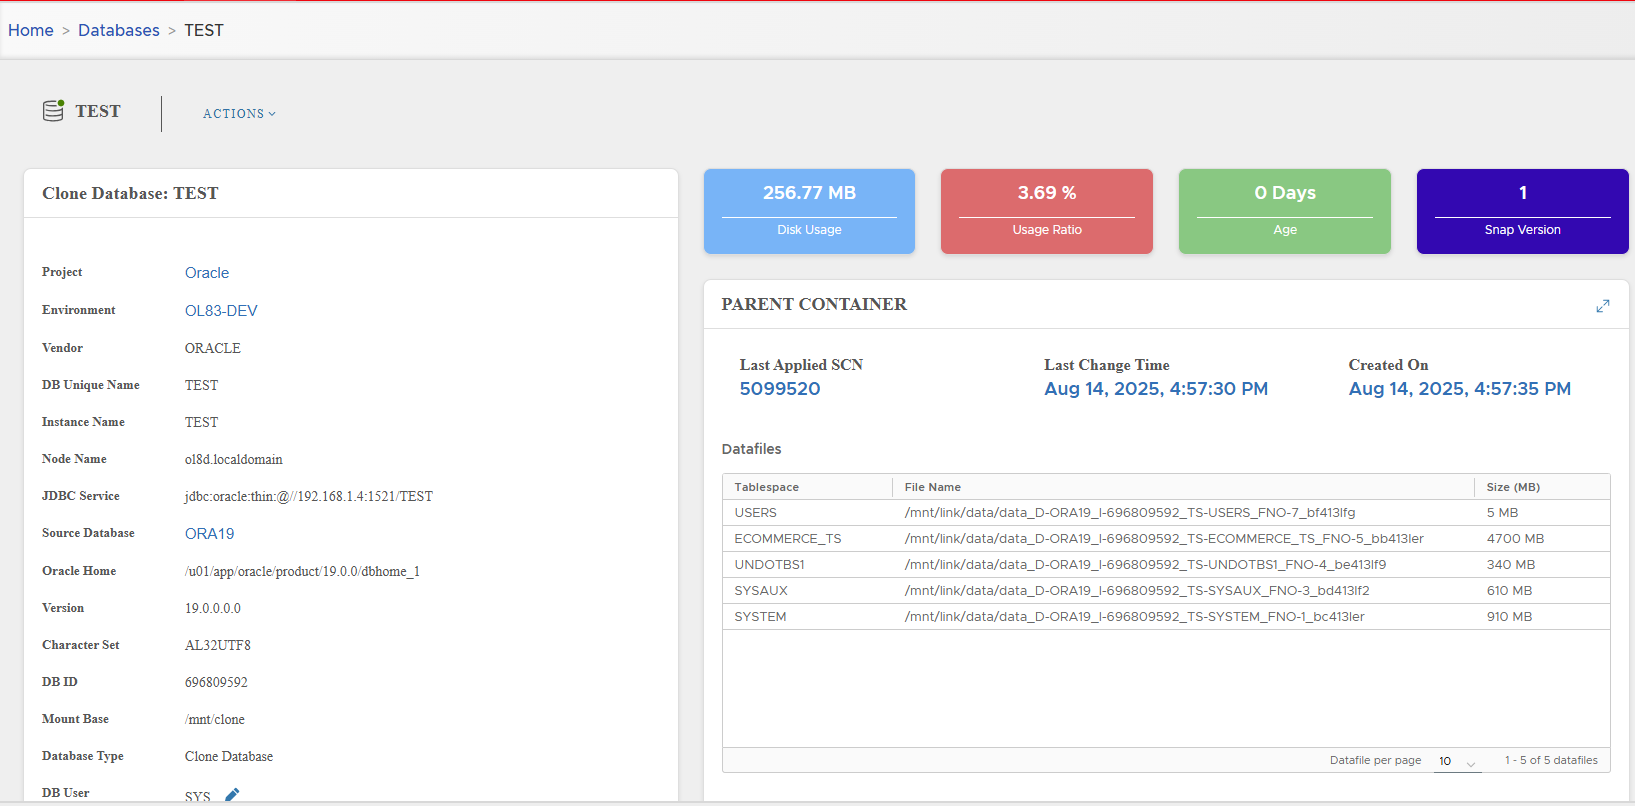
Access the newly created Virtual Clone detail page.
📋 Oracle Virtual Clone Management
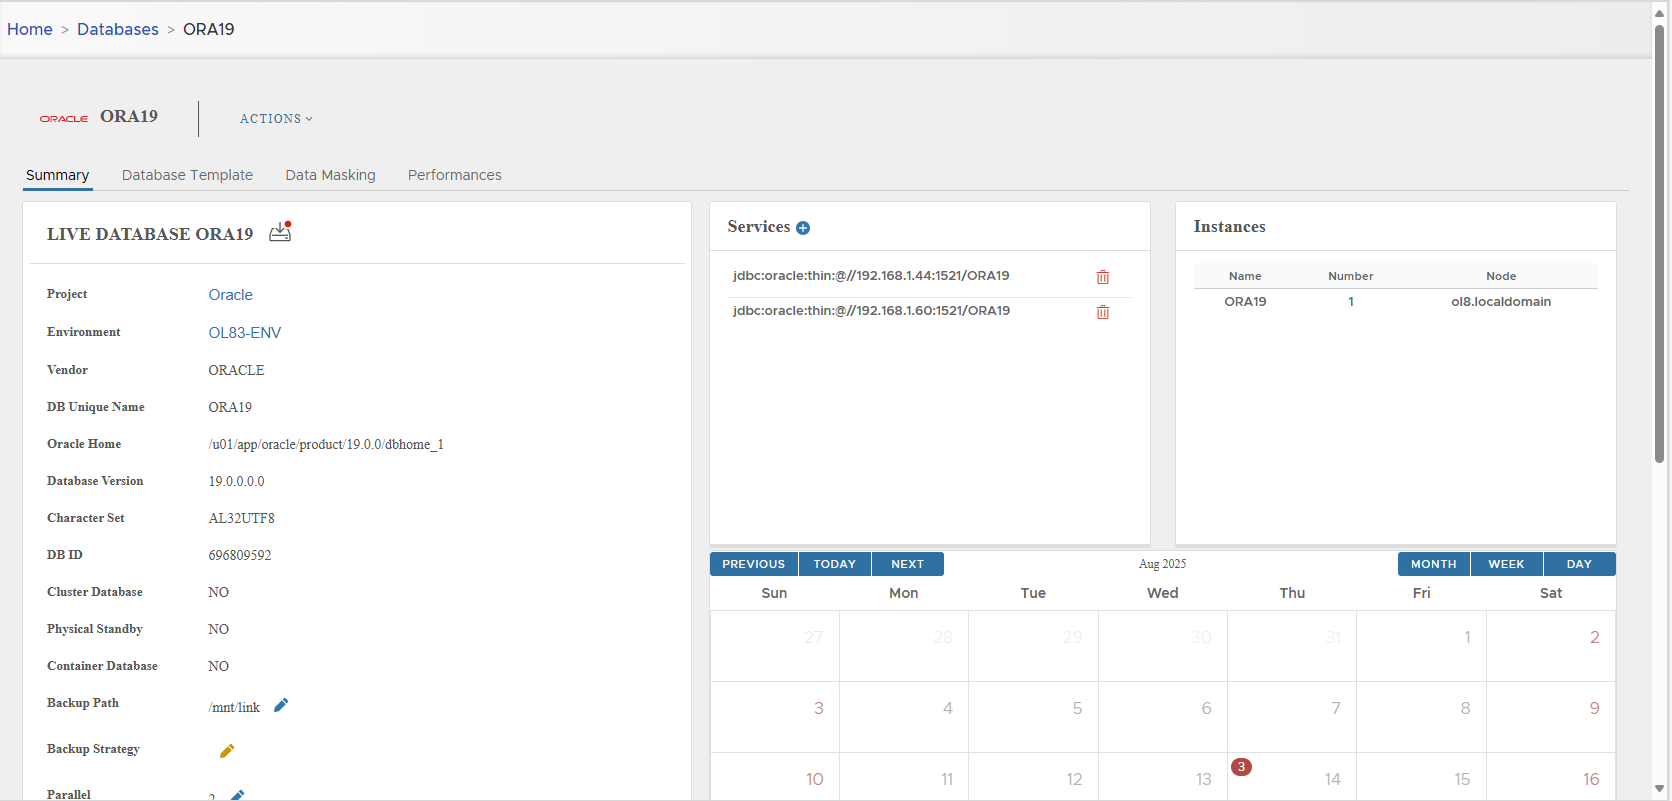
Configuration Parameters
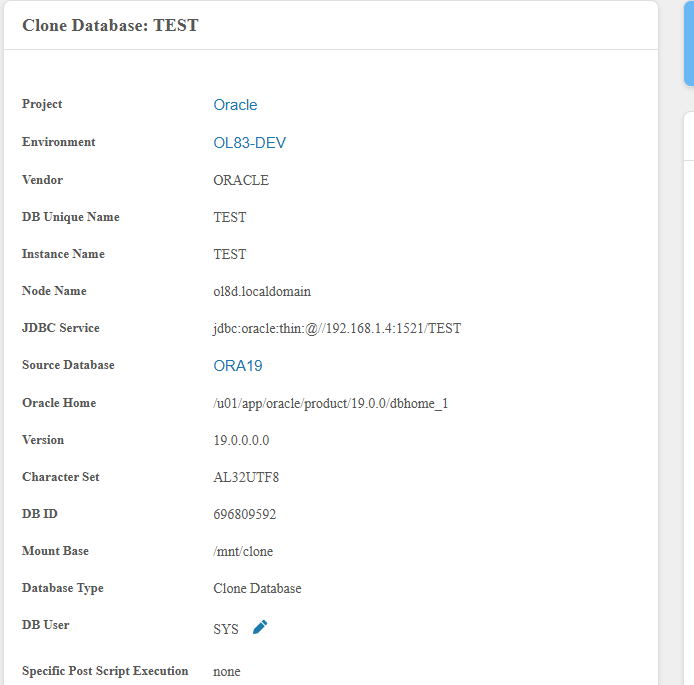
Clone detail page (left panel) displays all settings:
| Parameter | Description |
|---|---|
| Project | Project to which clone belongs |
| Environment | Clone environment |
| Vendor | Always ORACLE |
| DB Unique Name | Unique database identifier |
| Instance Name | Oracle instance name |
| Node Name | Host node name |
| JDBC Service | JDBC connection string |
| Source Database | Name of source DB |
| Oracle Home | ORACLE_HOME path |
| Version | Oracle version |
| Character Set | Clone character set |
| DB ID | Clone DB identifier |
| Mount Base | NFS mount point |
| Database Type | Clone Database |
| DB User | Database credentials |
| Specific Post Script Execution | Status (none, failed, success) |
| Generic Post Script Execution | Status (none, failed, success) |
| Datamasking | Status (none, failed, success) |
| Creation Time | Timestamp of clone creation |
| Created By | User who created the clone |
Dashboard Cards
On the right side:
- Disk Usage
- Disk Usage Ratio (vs live DB)
- Clone Age
- Snapshot Version (increments on reset)

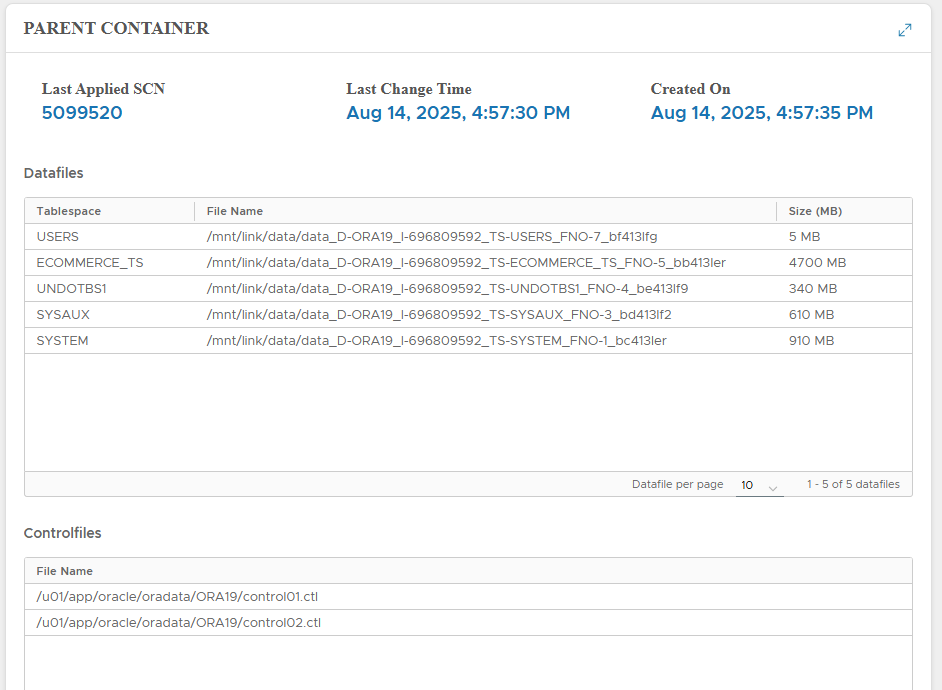
Parent Container
Displays lineage of parent snapshot:
- Last Applied SCN
- Last Change Time
- Snapshot creation time
- Datafiles, controlfiles, tempfiles
🔑 Change Credentials
- Click pencil near DB User.
- Enter new Username/Password.
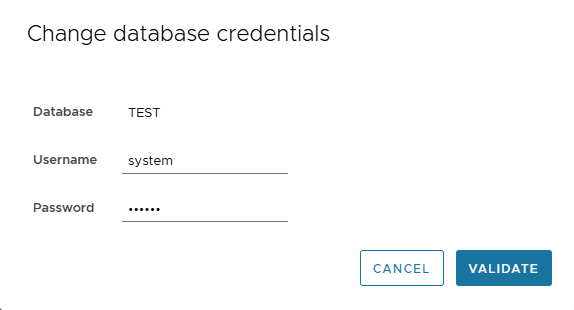
- Click VALIDATE.
⚡ Actions on Virtual Clone
Available from Actions menu:

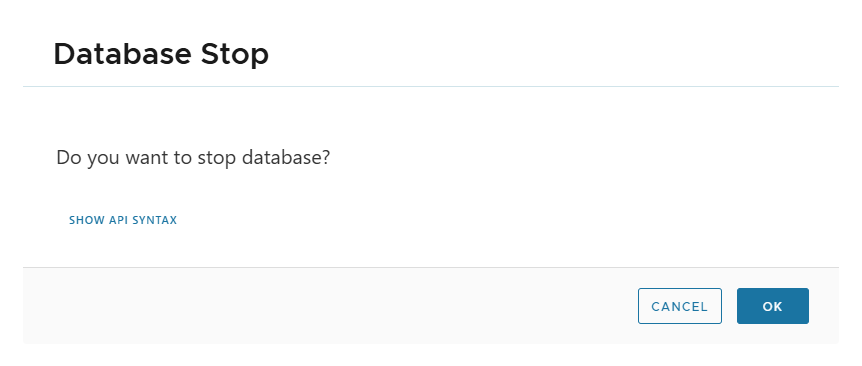
⏹ Stop
- Stops clone DB.
- Unmounts NFS from host.
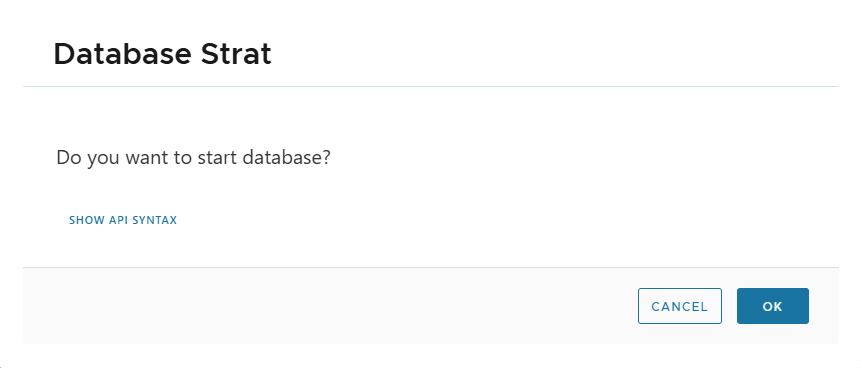
▶️ Start
- Starts clone DB (mount + open DB).
🔄 Reset
- Rewinds clone to initial state (all changes lost).
- Snapshot version increments.

🤝 Share
- Creates another similar virtual clone on same/new environment.
- No masking/post-script executed → very fast.
Steps:
- Actions > Share → Confirm.
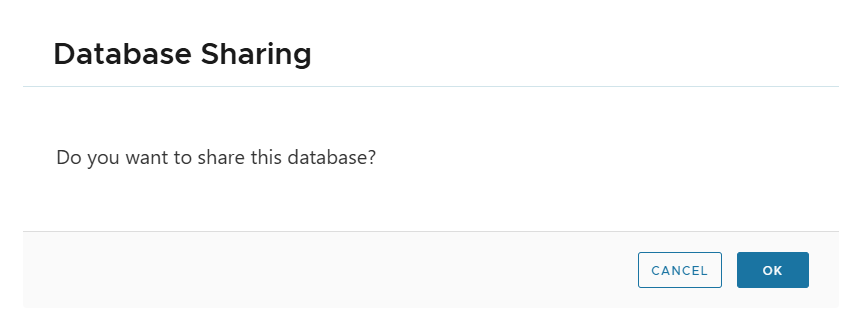
- Select target environment.

- Enter DB config (Name, Mount Base, DB Unique Name, Instance Name).
- Review summary → Finish.
- Follow job progress.
- New shared clone is listed.
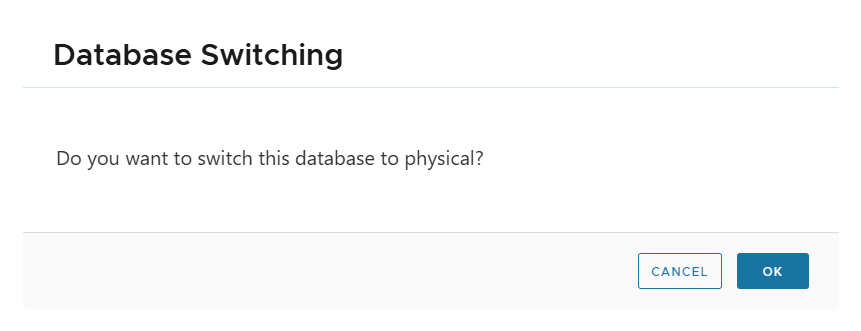
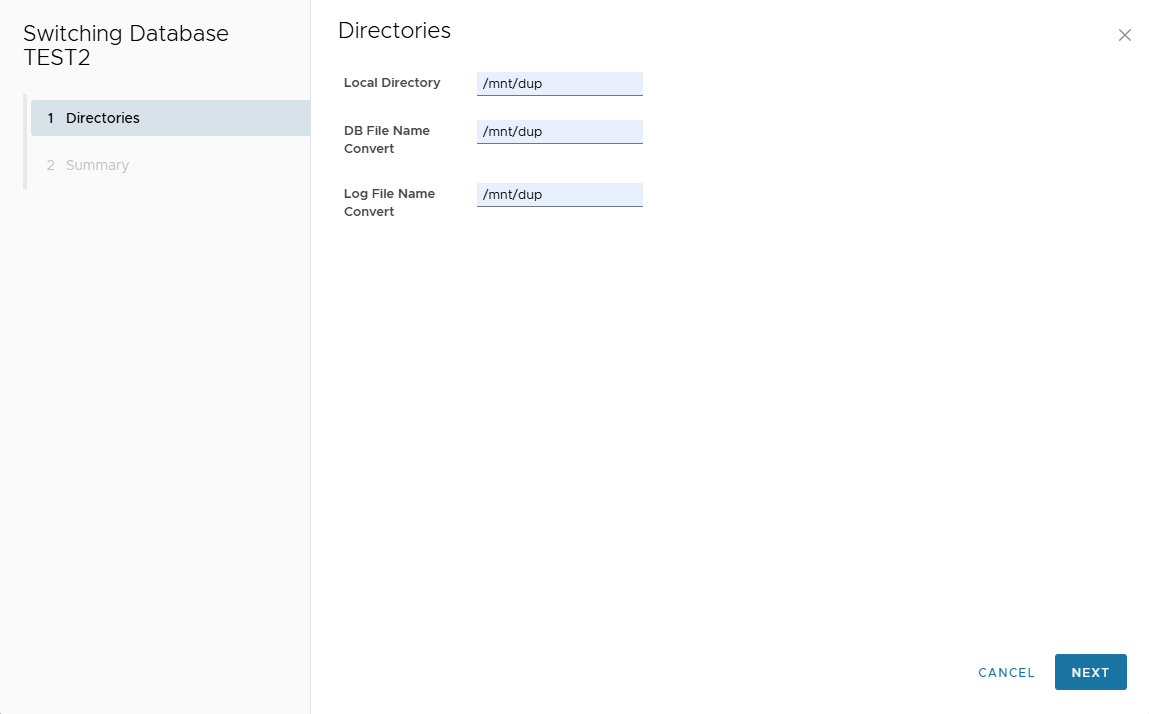
💽 Convert to Physical
- Moves clone DB files to local host directory.
- Requires sufficient disk space (same size as source DB).
Steps:
- Actions > Convert to Physical → Confirm.
- Enter Local Directory, DB File Name Convert, Log File Name Convert.
- Review summary → Finish.
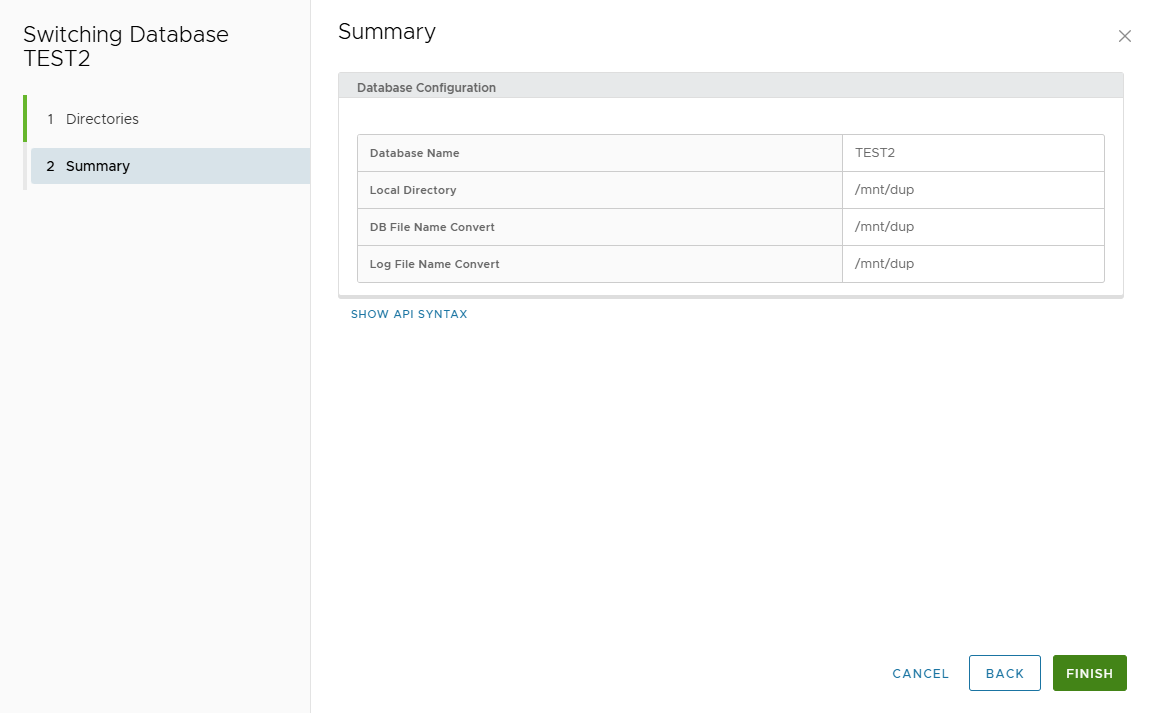
- Track job progress.
- Converted DB is listed as Physical Clone.
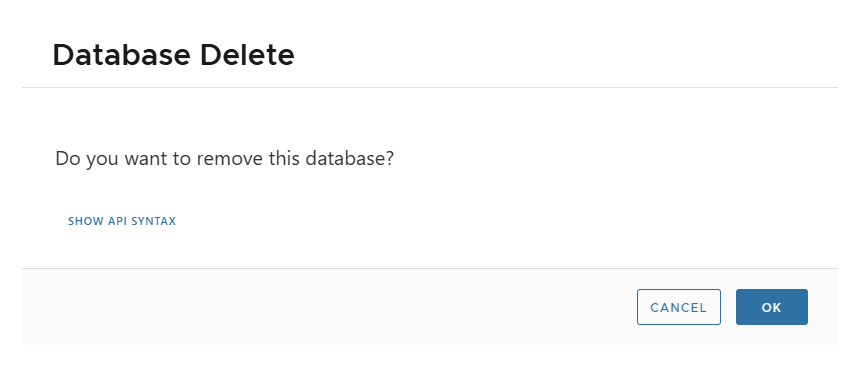
🗑 Delete
- Deletes virtual clone metadata.
- Confirmation required.

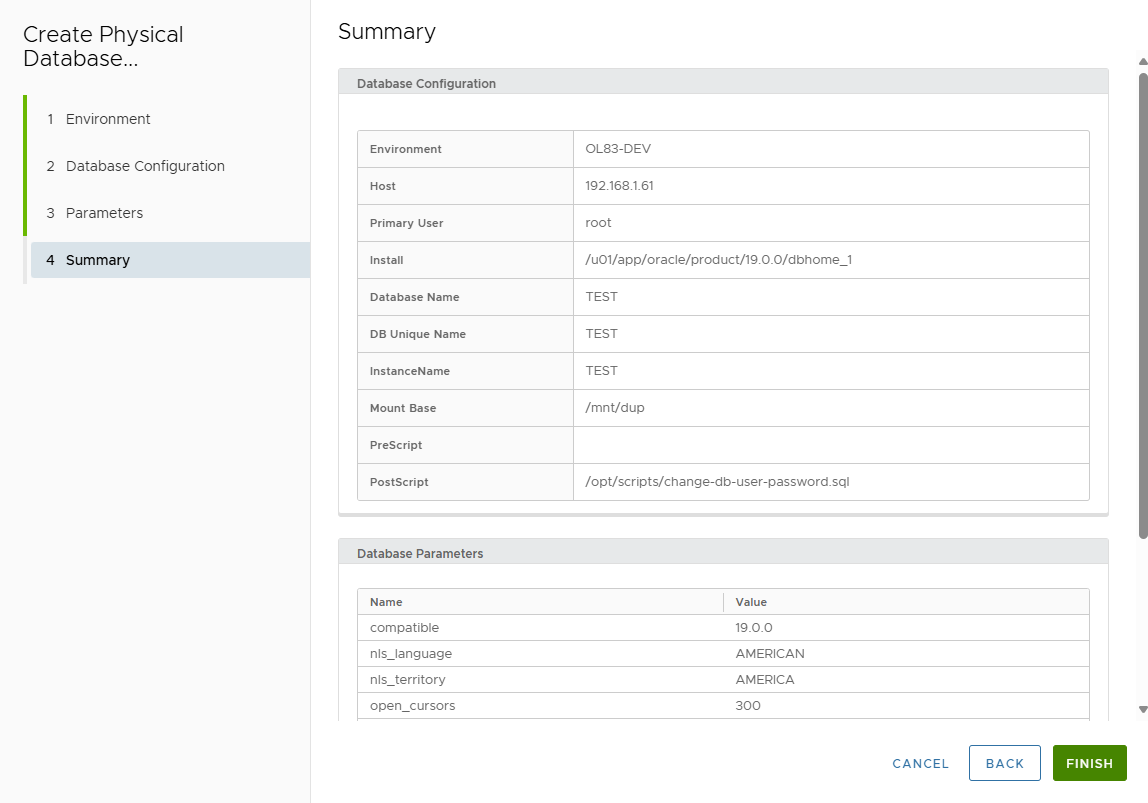
🏗️ Create Oracle Physical Clone
-
Go to Oracle database detail page.
-
Actions > Create Physical Clone → Confirm.
-
Cloning wizard appears.
-
Select Target Environment.
-
In Database Configuration page, enter:
- Database Name
- Mount Base
- DB Unique Name
- Instance Name
- Post Script path (optional)
- RMAN Channels
-
Parameters page → Customize parameters.
-
Review Summary.
-
Click FINISH.
-
Follow progress in Jobs list.

-
Physical clone DB metadata visible in detail page.
(No container defined in XLServer).
🗑 Delete Physical Clone
- Actions > Delete.
- Removes clone metadata from XLServer only.
- Database continues to run independently on target host.
✅ Summary
- Virtual Clones: Fast, lightweight, shareable, resettable, convertible.
- Physical Clones: Full independent copies, resource-heavy, slower to create.
- Both provide a safe, isolated environment for testing and dev, without impacting production.