MySQL Backup
XLServer provides advanced backup and cloning capabilities for MySQL databases, including both standalone servers and clustered deployments.
By integrating native MySQL tools and ZFS snapshots, XLServer ensures fast backup, reliable recovery, and efficient cloning for development, testing, and data protection.
⚙️ Prerequisites
Before linking and managing a MySQL database server, ensure the following requirements are met:
- ✅ MySQL server is reachable from XLServer (network connectivity must be open).
- ✅ Binlog is enabled in the source MySQL database server (required for incremental backup and recovery).
- ✅ Valid MySQL user credentials with backup privileges and access to catalog system views.
- ✅ SSH access from XLServer to the host (or all nodes in case of a MySQL cluster).
- ✅ MySQL version ≥ 5.7 is supported.
- ✅ Enough free space exists in the datastore to store initial golden image backup and incremental updates.
- ✅ NFS client installed on the MySQL host(s), since backup and clone operations are mounted over NFS.
Note
Ensure the MySQL user has all required privileges for backup. A dedicated SQL script to create this user is provided in the appendix “MySQL User”.
Never link a database to the PUBLIC project, otherwise it will be visible and accessible to all XLServer users.
🔗 Linking a MySQL Database Server
Linking a MySQL database server to XLServer is the first step to bring it under protection.
This process creates the golden image copy (a full backup), which will serve as the baseline for future incremental backups and snapshots.
Step 1 — Open Database Server Detail
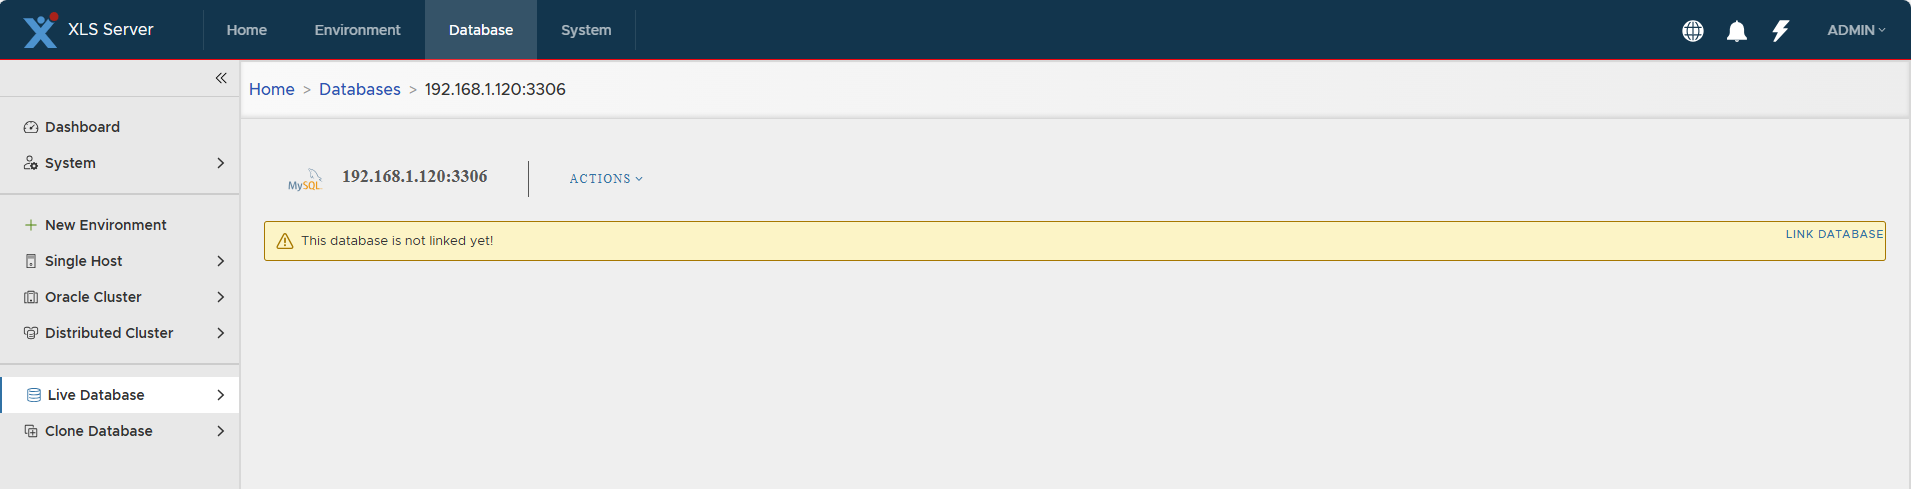
Navigate to the MySQL database server detail page.
If the database is not yet linked, you will see the option to link it:
Step 2 — Start Linking Wizard
Click “Link Database” (or select Link from the Actions menu).
The Linking Wizard opens.
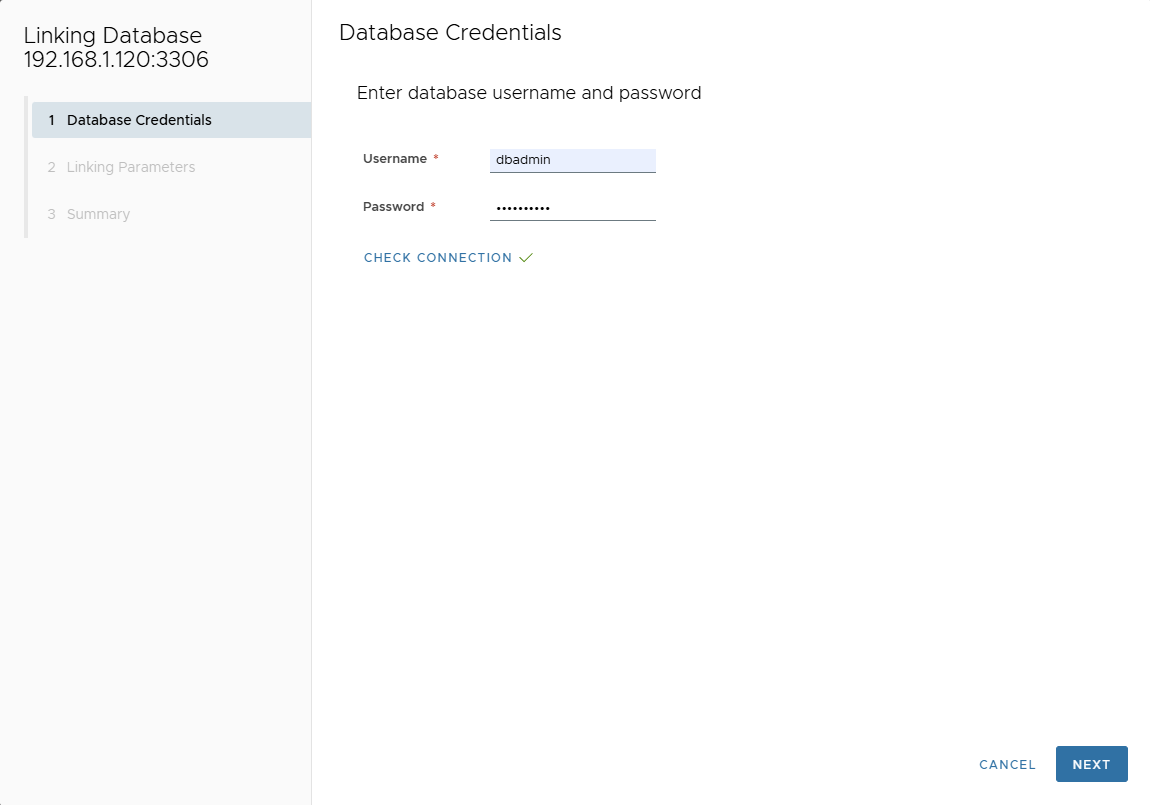
Step 3 — Validate Credentials
Enter MySQL credentials, then click CHECK CONNECTION.
The wizard only allows moving forward if the database connection succeeds.
Step 4 — Configure Linking Parameters
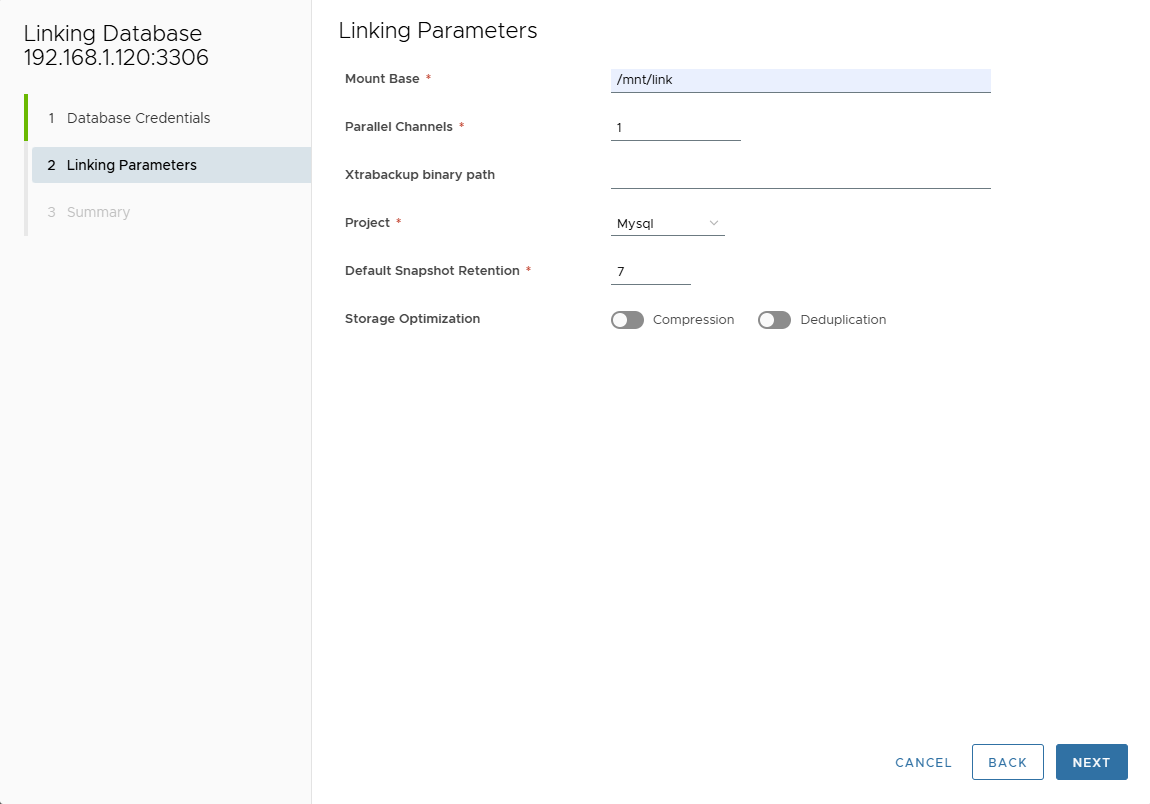
On the Linking Parameters page, provide detailed options:
- Mount Base: NFS mount point used for backup. Example:
/mnt/link. - Parallel Channels: Number of backup threads. Default
1, maximum32. Higher values speed up backup but increase host load. - XtraBackup Path: Optional path if Percona XtraBackup is already installed on the MySQL host. If empty, XLServer uses the bundled xtrabackup.
- Project: Select the project where this database server belongs. By default, XLServer auto-selects the project of the environment.
- Default Snapshot Retention: Default retention period for snapshots. Snapshots used by clones are retained automatically.
- Binlogs Deletion Policy: Choose automatic deletion of binlogs not required for recovery or standby after successful backup.
- Storage Optimization: Enable compression and/or deduplication to reduce storage usage. May impact backup performance.
Step 5 — Review Summary
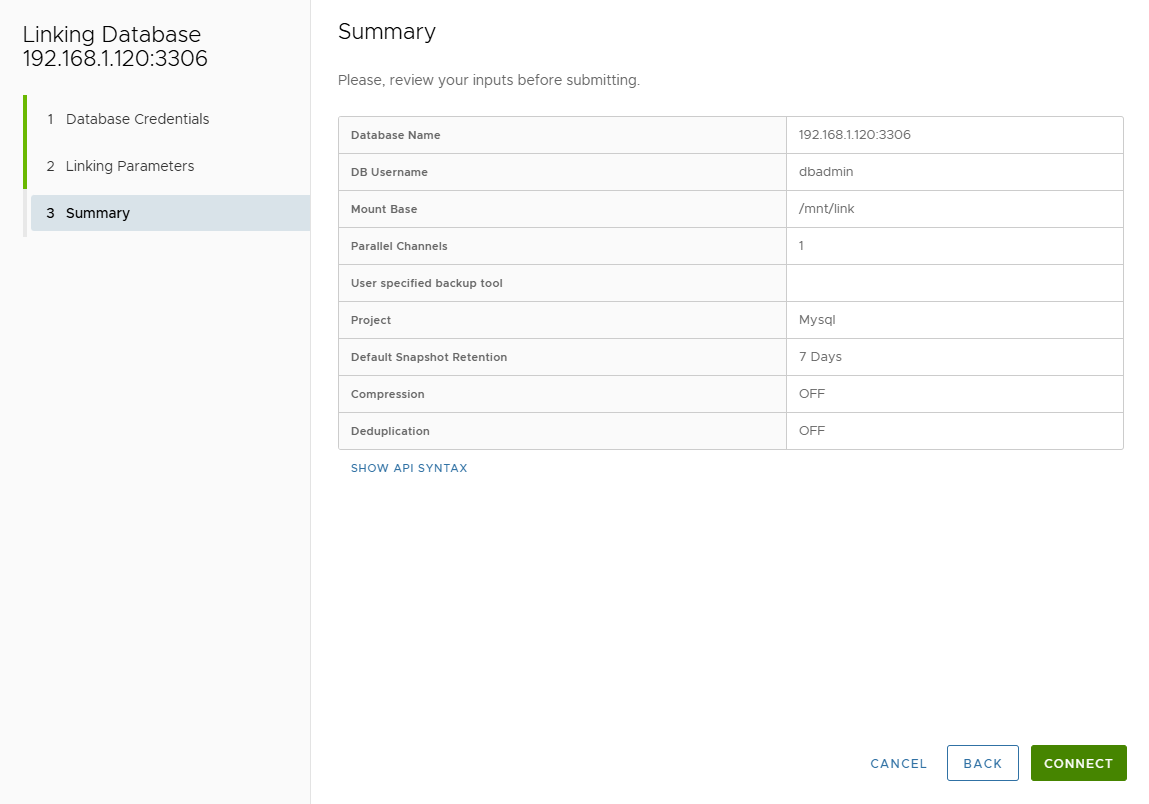
A summary page displays all selected parameters.
Step 6 — Connect and Validate
Click CONNECT to finalize database linking.
You can track job progress from the Jobs page.
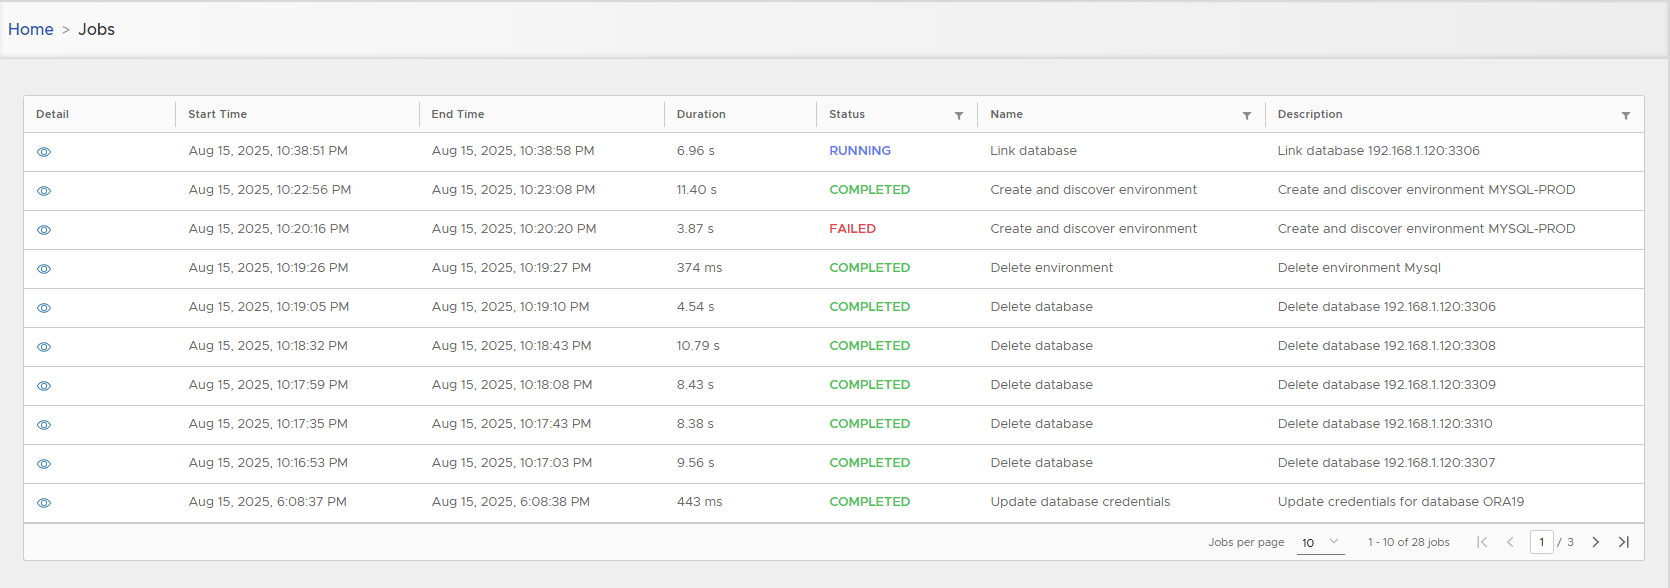
Step 7 — Verify Linked Database
Once linking is complete, return to the database page to confirm details.
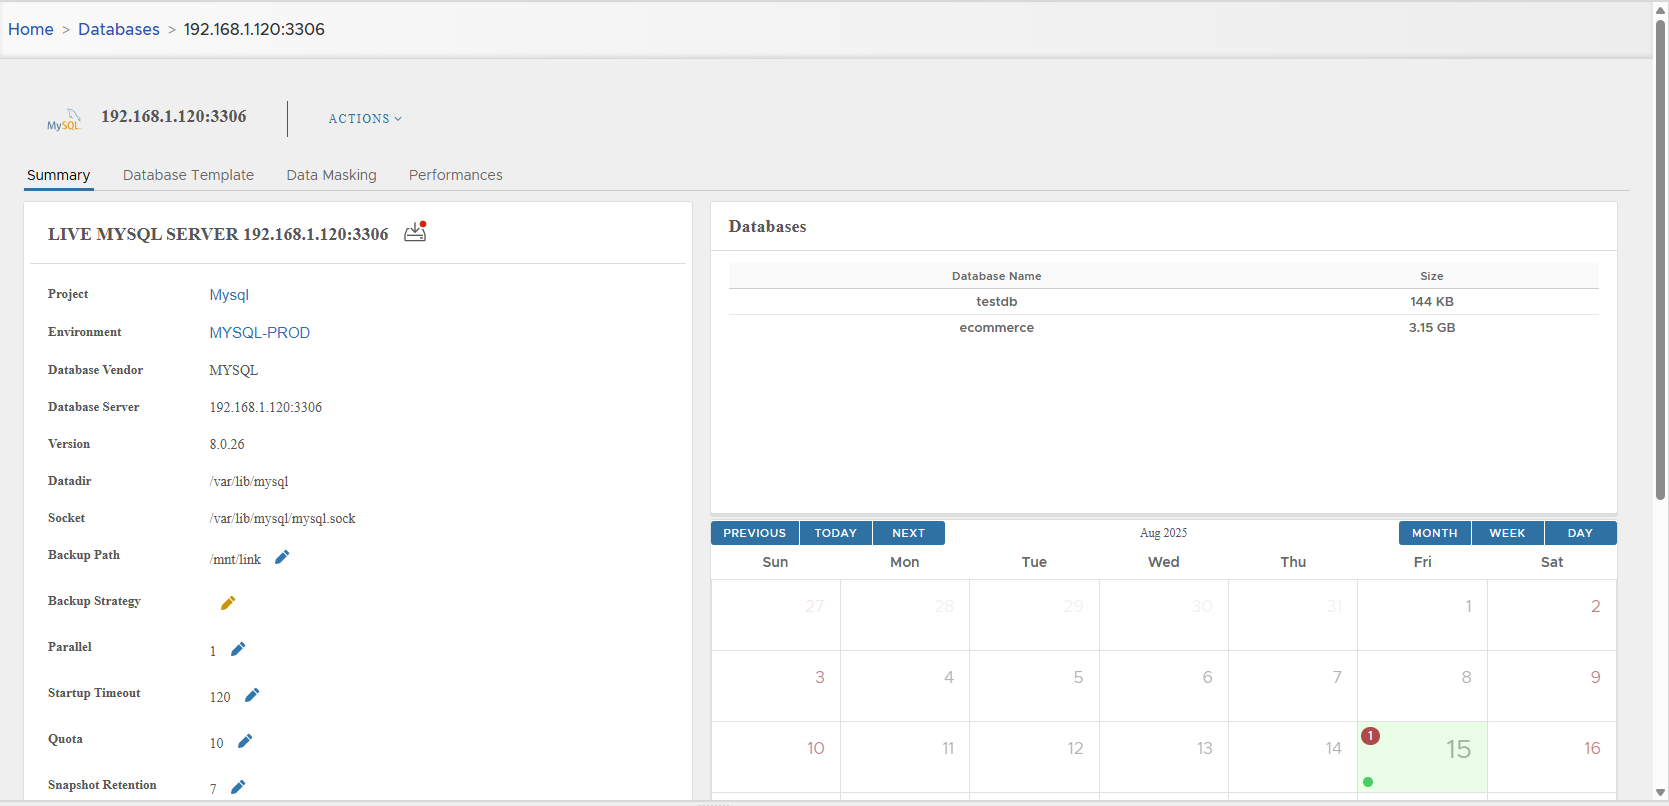
📊 MySQL Live Database Server Detail
Each linked MySQL live database server has a dedicated detail page with four main tabs:
- Summary
- Database Template
- Data Masking
- Performance
1. Summary Tab
The summary tab is divided into three areas:
- Database Parameters — metadata and configuration
- Database Schemas — schemas and sizes
- Snapshots Calendar — timeline of backups and snapshots
Database Parameters
A complete list of parameters is shown, such as:
| Setting | Description | Default Value | Modifiable |
|---|---|---|---|
| Project | Project to which the database is attached | — | — |
| Environment | Environment where the database resides | — | — |
| Vendor | Always MYSQL | MYSQL | — |
| Database Server | Endpoint of the server (hostname/IP:port) | — | — |
| Version | MySQL server version | — | — |
| Datadir | Filesystem path to database data files | — | — |
| Socket | Socket path for local connections | — | — |
| Backup Path | Path used for backup (corresponds to Mount Base defined during linking) | — | ✅ |
| Backup Strategy | Strategy name if one is attached | None | ✅ |
| Parallel | Number of backup threads | 1 | ✅ |
| Startup Timeout | Time to wait for clone server startup before failing | 120s | ✅ |
| Quota | Maximum number of clones that can be created. 0 = unlimited | 10 | ✅ |
| Snapshot Retention | Default snapshot retention | 7 days | ✅ |
| Database Type | Always Live Database | Live Database | — |
| DB User | MySQL backup user credentials | — | ✅ |
| Generic Post Script | Optional SQL script executed after clone creation | — | ✅ |
| Connecting Mode | Currently only ONLINE (requires DB connectivity). Offline mode planned for future versions. | ONLINE | — |
| Discovery | AUTO = discovered automatically during environment refresh | AUTO | — |
| Linked On | Timestamp when DB was linked | — | — |
| Last Sync Time | Timestamp of last snapshot creation | — | — |
| Last Refresh Time | Timestamp of last parameter refresh | — | — |
| Created By | User who added the database to XLServer | — | — |
Database Schemas
Lists all database schemas detected on the server, with size information.
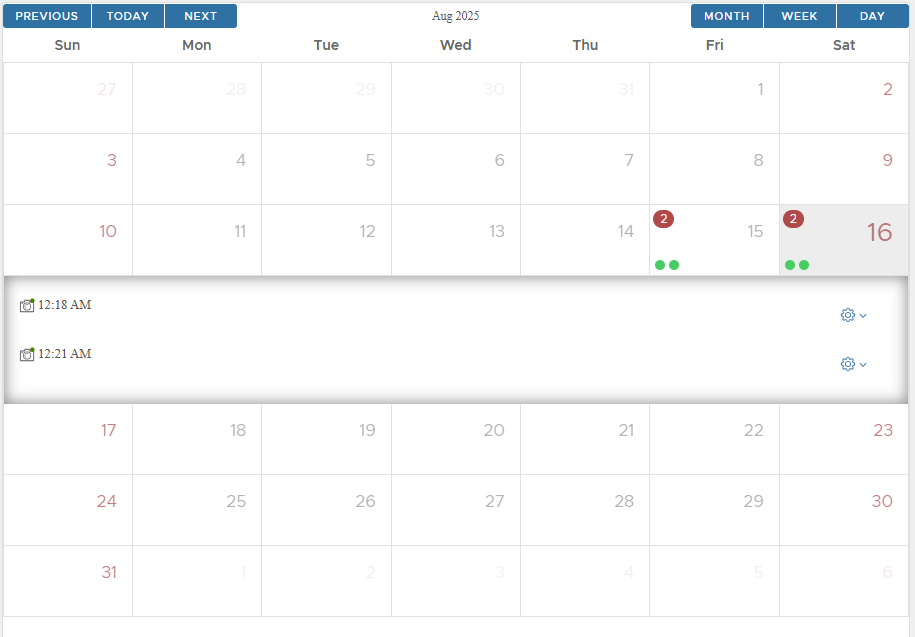
Snapshots Calendar
Shows a calendar view of all snapshots.
- Green dots = successful snapshots
- Red dots = failed snapshots
Click a day to display snapshot list for that date.
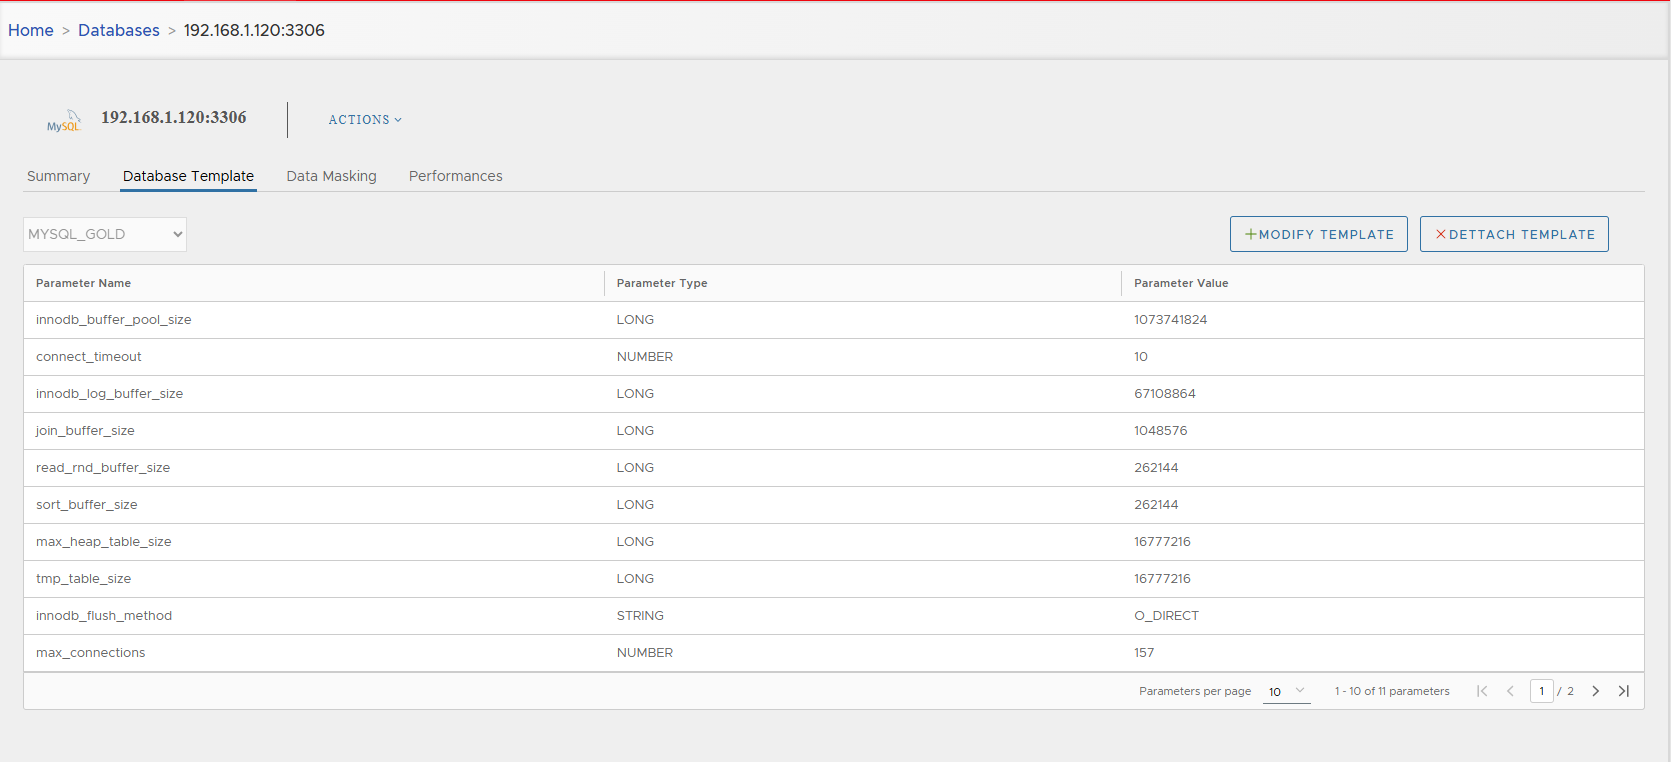
2. Database Template Tab
Database templates define reusable parameters (e.g., memory, parallelism) applied automatically to clones.
- Attach template: Associate a template to live DB
- Modify template: Switch to a different template
- Detach template: Remove template association
3. Data Masking Tab
This tab allows attaching data masking templates to the live database.
These rules are applied automatically to clones to protect sensitive data.
- Column-level masking — apply templates to specific columns (e.g., credit card numbers).
- Table-level masking (shuffling) — shuffle entire table rows to keep realistic but anonymized data.
The masking wizard provides:
- Database connection validation
- Table selection
- Column selection and rule assignment
- Review and apply
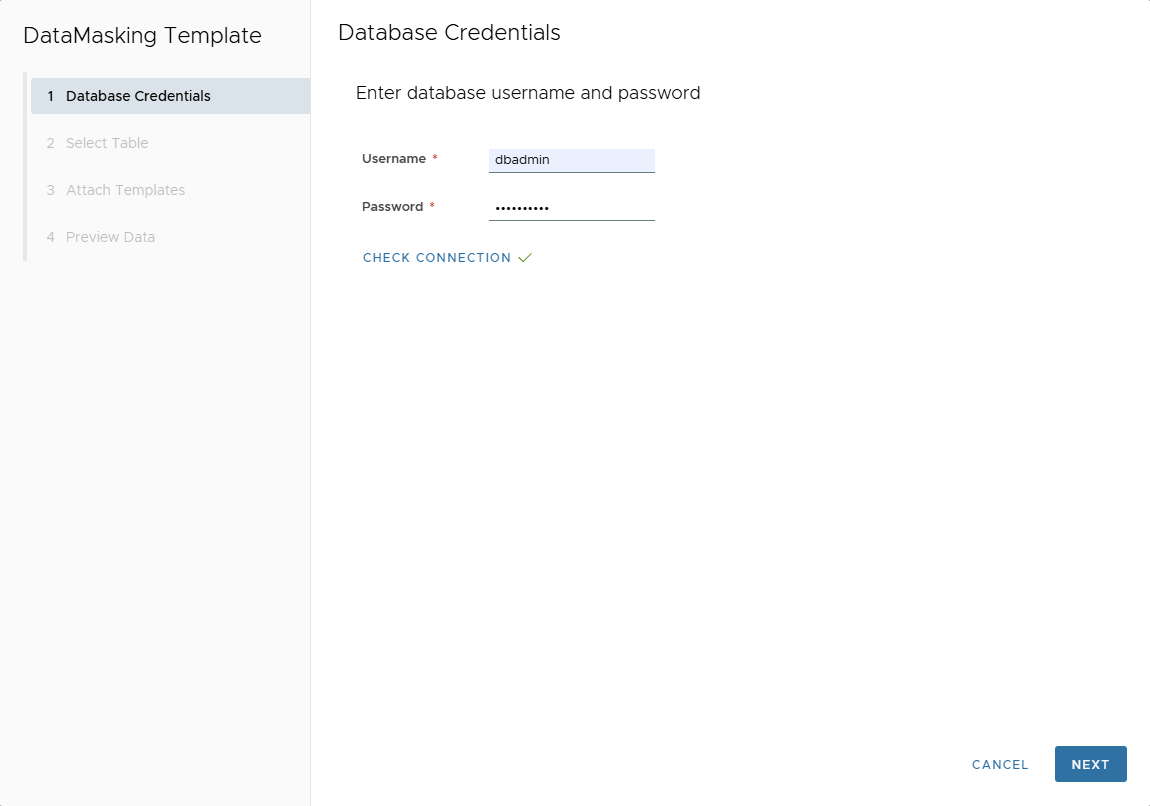
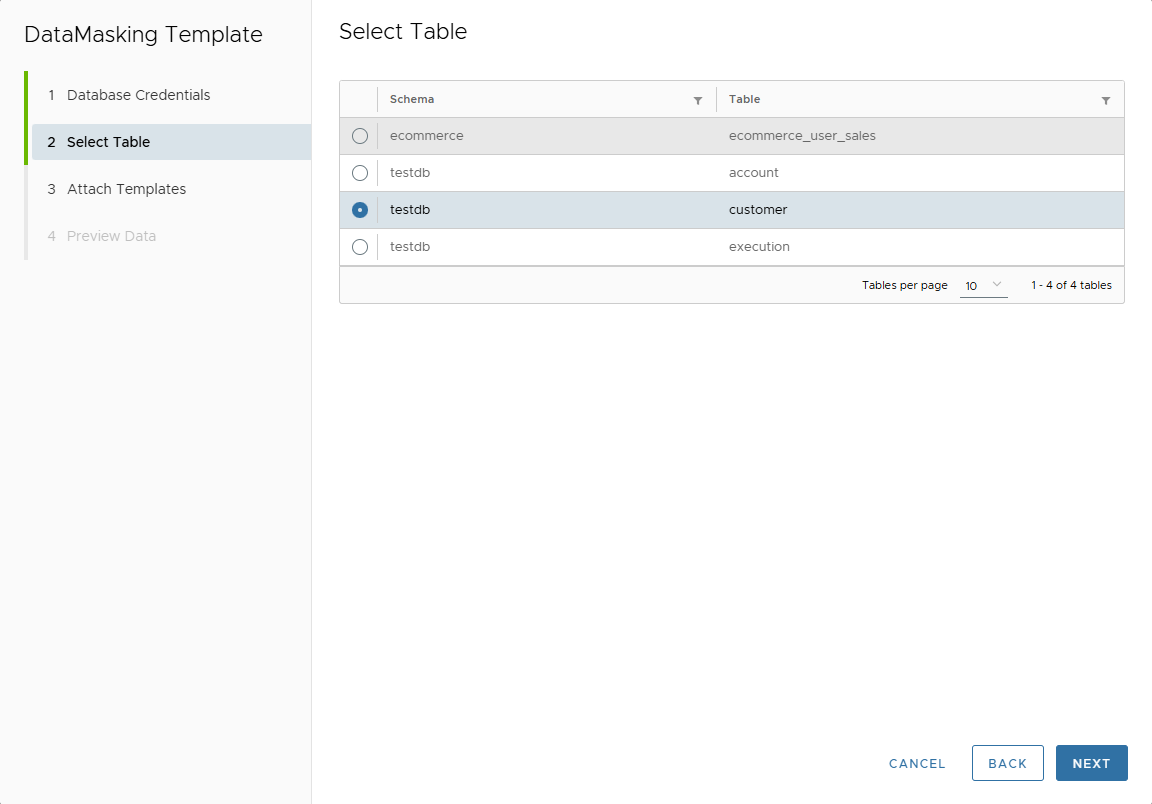
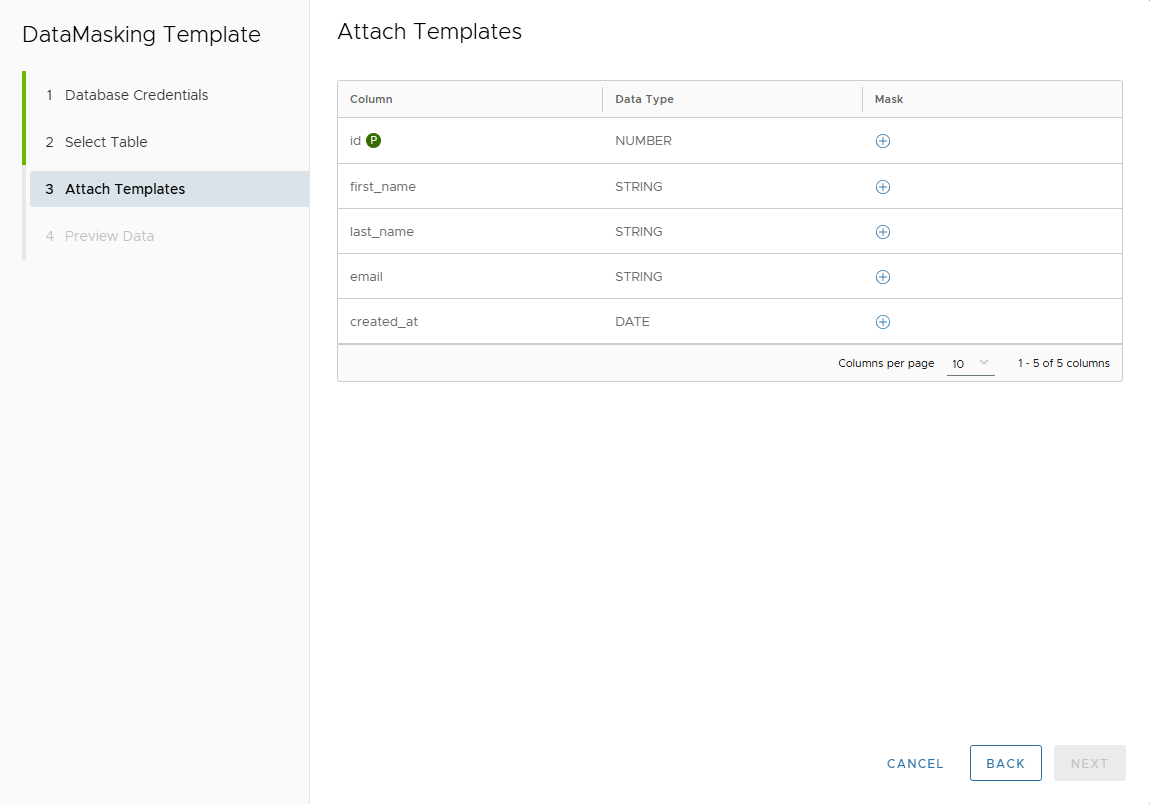
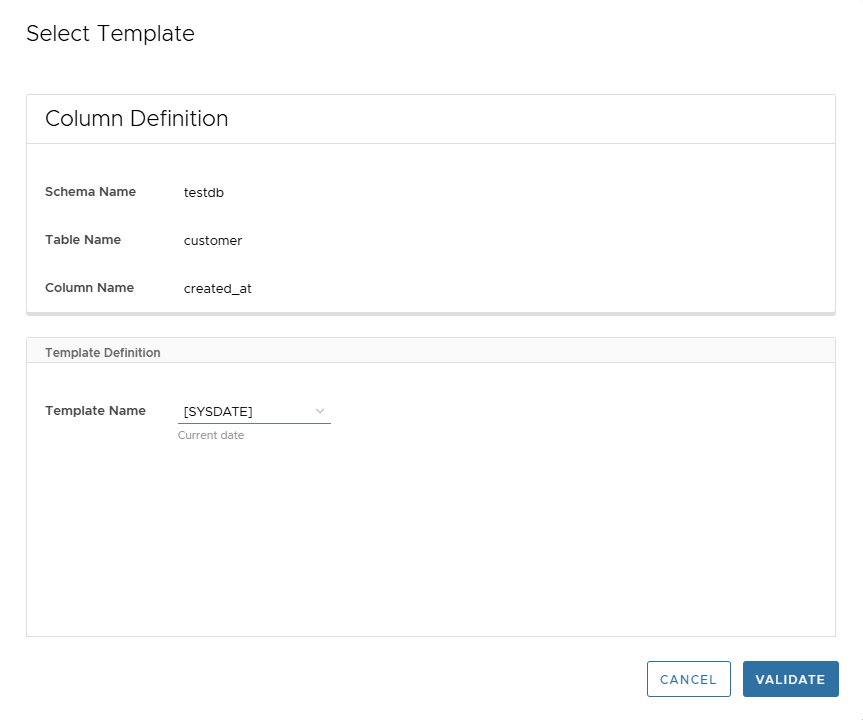
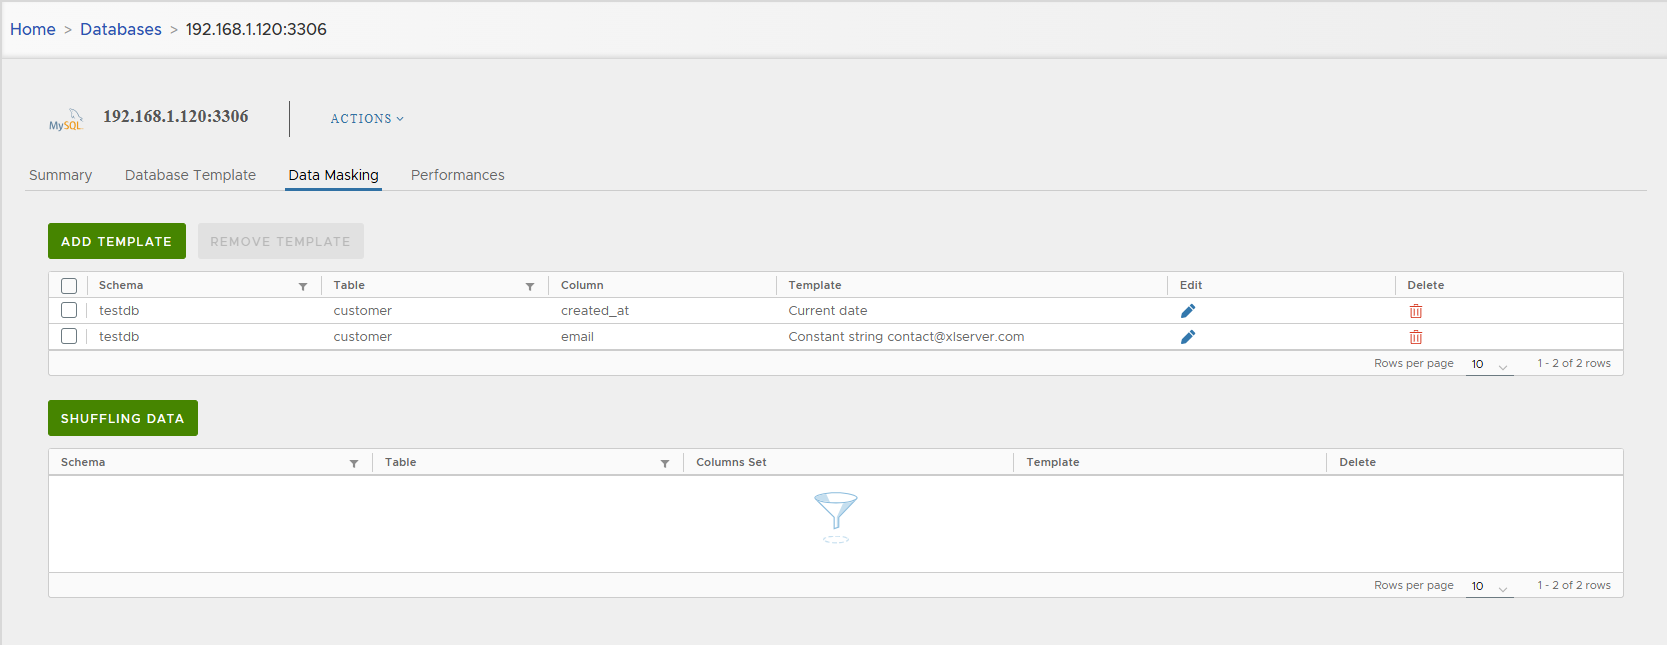
Data masking ensures cloned databases used in development/test environments do not expose production-sensitive data.
4. Performance Tab
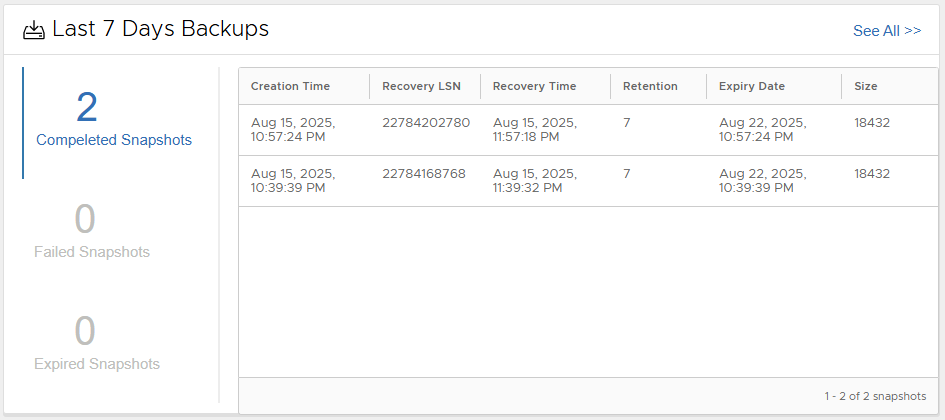
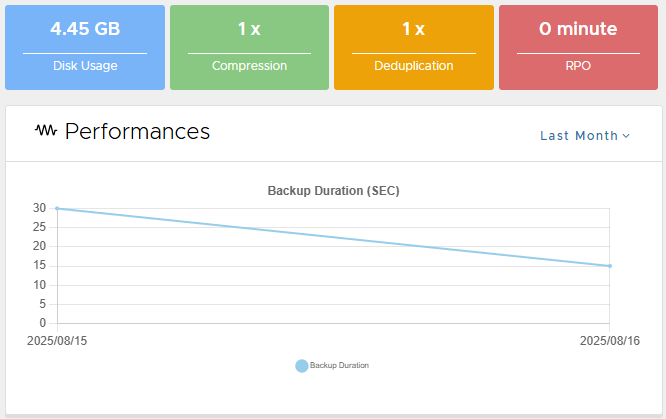
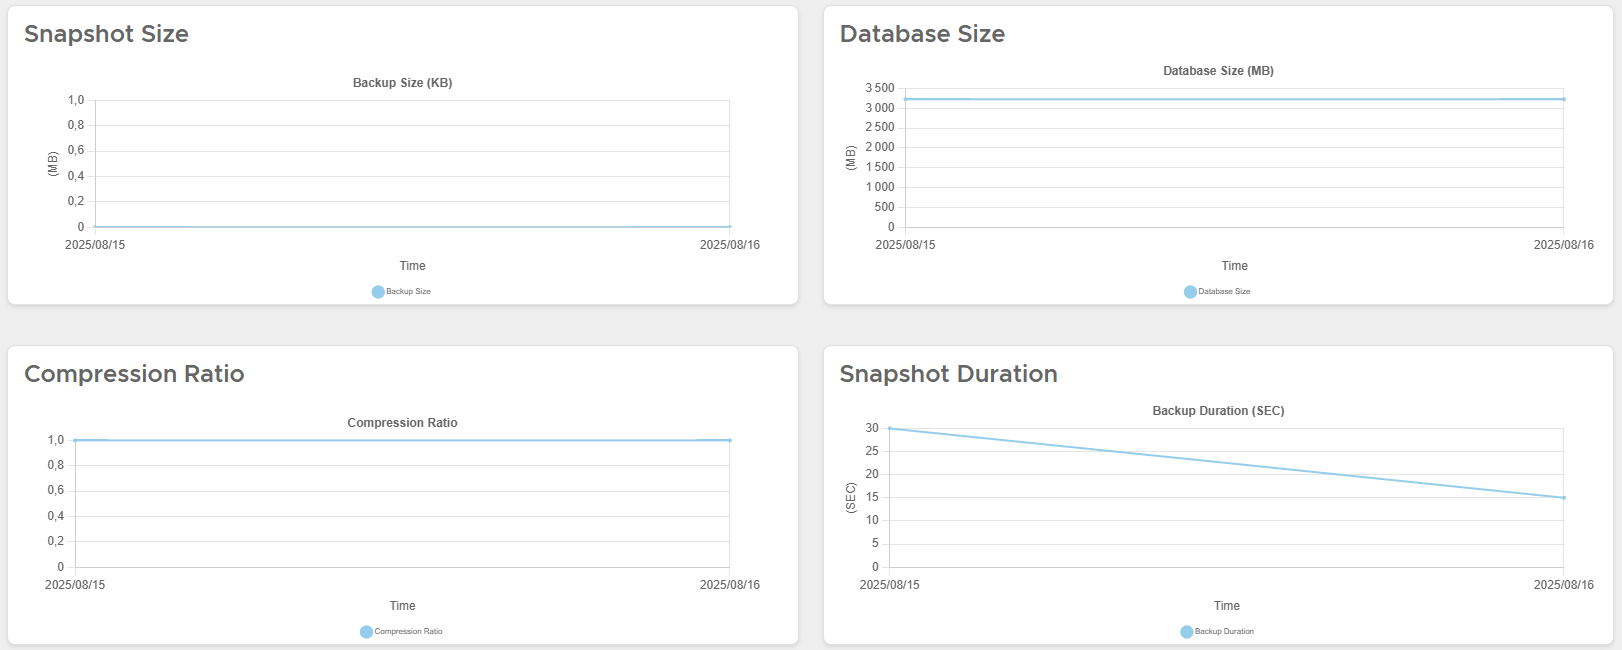
Provides full visibility into backup and storage efficiency:
- Snapshot list (last 7 days)
- Disk usage statistics
- Compression ratio
- Deduplication ratio
- Backup performance (duration, throughput)
- Success vs failed snapshots ratio
- Trends for backup size, DB size, compression ratio, duration

Note
Performance monitoring helps proactively identify bottlenecks and optimize backup/clone operations.
🛠️ Actions on MySQL Live Database
From the Actions menu, users can perform:
- Snapshot
- Refresh
- Create Virtual Database
- Create Physical Database
- Mount Snapshot
- Restore
- Disable / Enable
- Delete
Each action is detailed below.
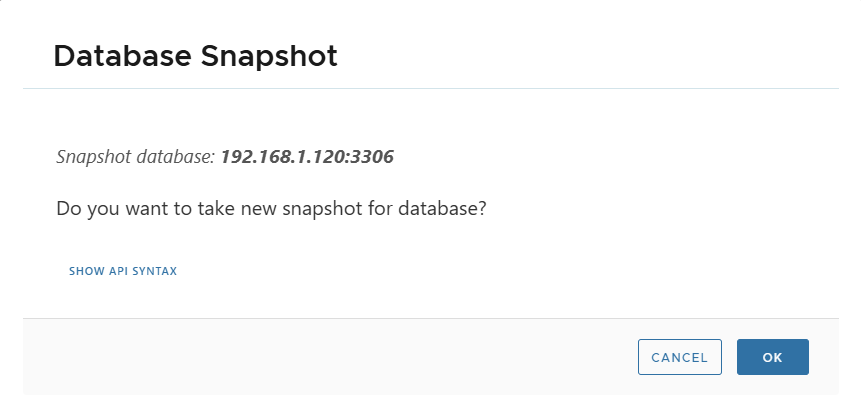
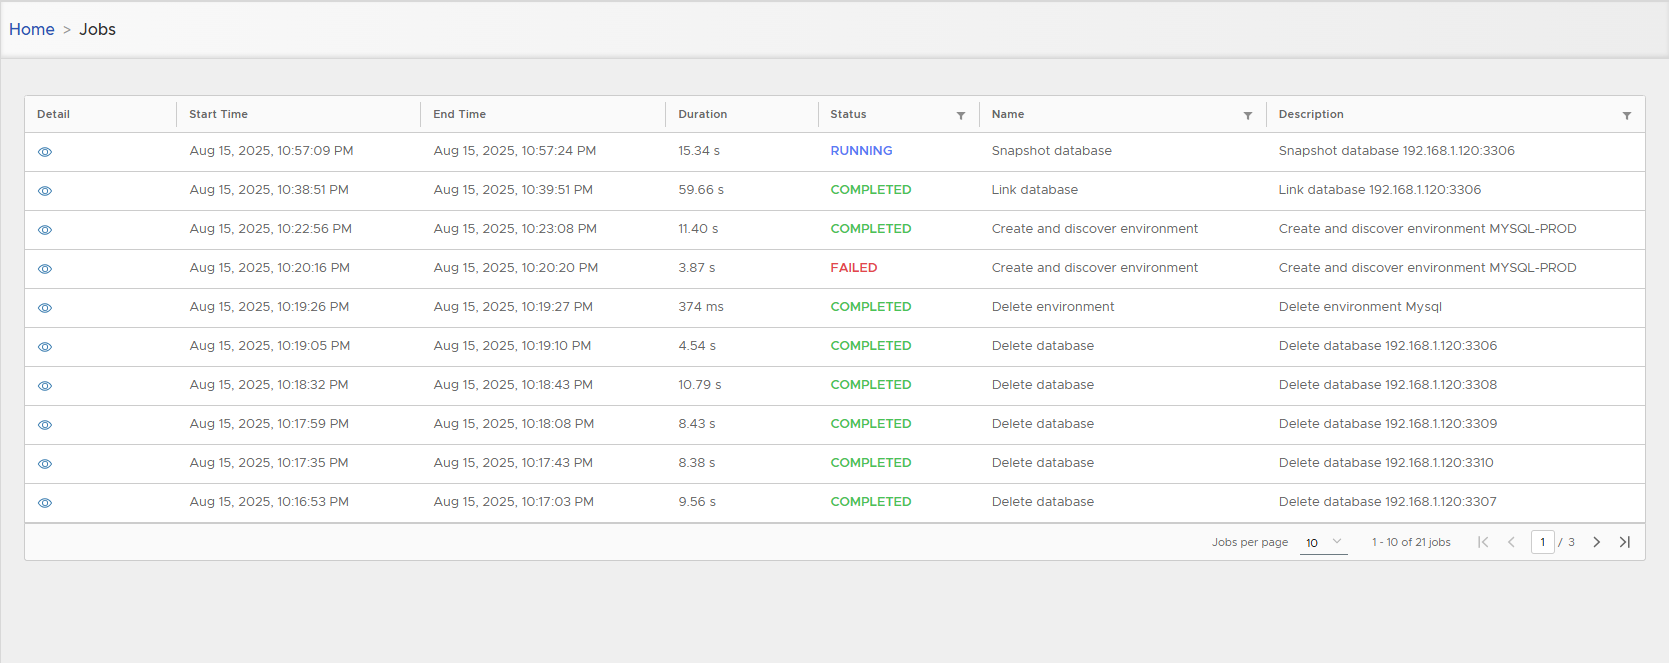
Snapshot
Take an on-demand snapshot.
The job progress is visible in the Jobs list.
Snapshots include:
- Recovery Time / Checkpoint LSN
- Snapshot size
- Retention
- Schema list
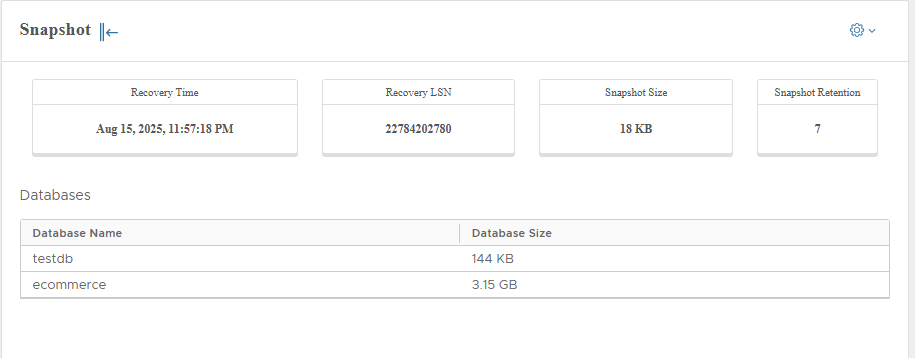
Snapshot-scoped actions include:
- Create Virtual DB
- Create Physical DB
- Mount Snapshot
- Restore
- Delete
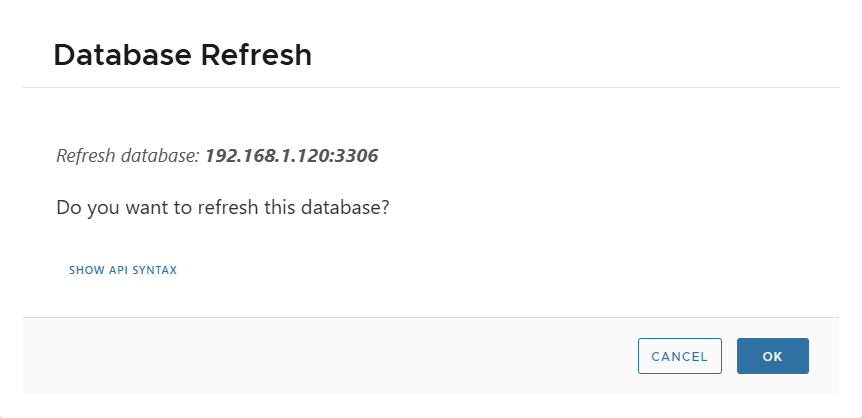
Refresh
Refreshes database parameters (no snapshot is taken).
Create Virtual Database
Creates an instant virtual clone from latest or specific snapshot.
- Fast (seconds)
- Minimal storage consumption
- Can be reset or shared
Create Physical Database
Creates a full physical clone with its own storage.
Useful for production-like test environments.
Mount Snapshot
Mounts snapshot content on source environment for manual recovery or inspection.
- Blocks further backups until unmounted
- Creates a staging clone
Restore
Restores the live DB from a snapshot.
Can be executed from latest snapshot or a chosen one.
Disable / Enable
Temporarily disables/enables database protection and actions.
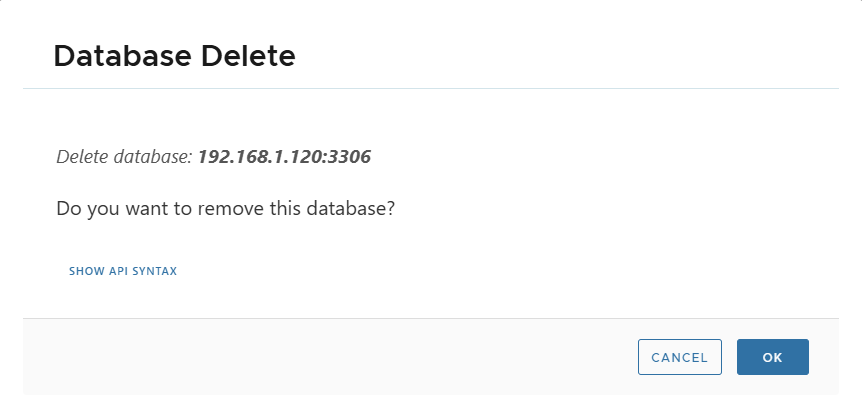
Delete
Removes the live database from XLServer.
Note
A live DB Server cannot be deleted if clones still exist. Delete all clones first.
🎯 Backup Strategy Management
Attaching a backup strategy ensures continuous protection.
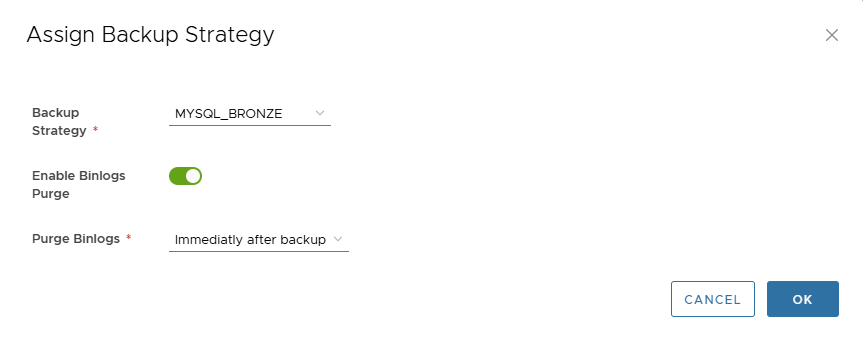
Assign Backup Strategy
Select a backup strategy and optionally enable binlog purge.
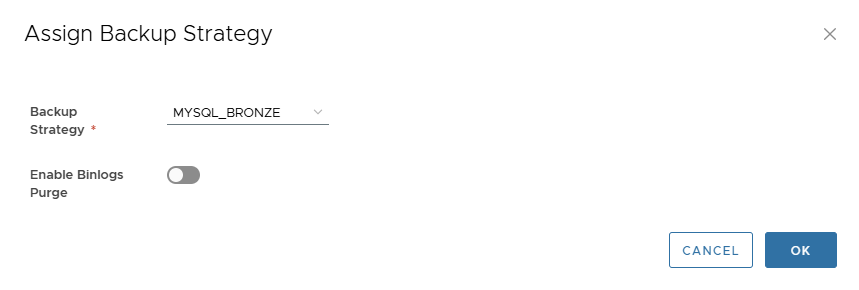
Modify Backup Strategy
Switch to another strategy or update binlog purge policy.
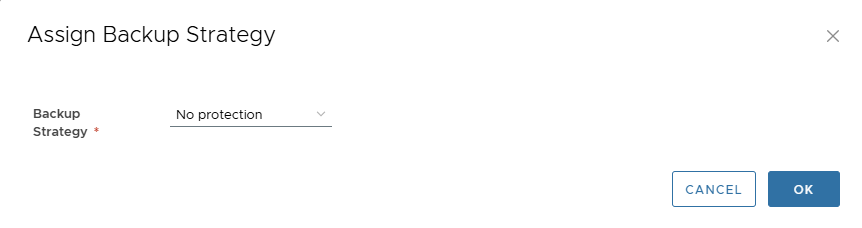
Remove Backup Strategy
Detach backup strategy by selecting “No protection”.
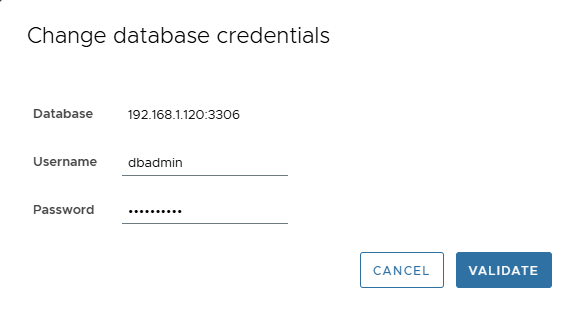
🔑 Change Database Credentials
Credentials can be updated anytime:
📅 Snapshot Management
Snapshots appear in calendar view.
Click a snapshot to view details and access actions.
✅ Conclusion
XLServer provides a complete lifecycle management for MySQL database servers:
- Automatic discovery
- Golden image creation
- Continuous incremental backups
- Secure cloning with masking
- Performance visibility
This ensures production-grade protection with the agility required for development and testing.
Appendix: Mysql User (Required Privileges)
To allow XLServer to perform backups, snapshots, and recovery operations, you should create a dedicated Mysql database user with the correct privileges. This user will be used when linking and snapshot the database in XLServer.
create-mysql-backup-user.sh
#!/bin/bash

# Script to create MySQL backup user with full privileges
# Usage: ./create-mysql-backup-user.sh <username> <password>

set -e  # Exit on any error

# Color codes for output
RED='\033[0;31m'
GREEN='\033[0;32m'
YELLOW='\033[1;33m'
BLUE='\033[0;34m'
NC='\033[0m' # No Color

# Function to print colored output
print_status() {
    echo -e "${GREEN}[INFO]${NC} $1"
}

print_warning() {
    echo -e "${YELLOW}[WARNING]${NC} $1"
}

print_error() {
    echo -e "${RED}[ERROR]${NC} $1"
}

print_header() {
    echo -e "${BLUE}[HEADER]${NC} $1"
}

# Function to show usage
show_usage() {
    echo "Usage: $0 <username> <password> [options]"
    echo ""
    echo "Options:"
    echo "  -h, --help          Show this help message"
    echo "  -r, --root-user     MySQL root username (default: root)"
    echo "  -s, --socket        MySQL socket path (default: /tmp/mysql.sock)"
    echo "  -H, --host          MySQL host (default: localhost)"
    echo "  -P, --port          MySQL port (default: 3306)"
    echo "  --drop-if-exists    Drop user if it already exists"
    echo "  --dry-run           Show SQL commands without executing them"
    echo ""
    echo "Examples:"
    echo "  $0 backup_user my_secure_password"
    echo "  $0 xlsbackup rachid --drop-if-exists"
    echo "  $0 backup_user password123 --host 127.0.0.1 --port 3306"
    echo "  $0 test_user test_pass --dry-run"
}

# Default values
ROOT_USER="root"
SOCKET="/tmp/mysql.sock"
HOST="localhost"
PORT="3306"
DROP_IF_EXISTS=false
DRY_RUN=false

# Parse command line arguments
while [[ $# -gt 0 ]]; do
    case $1 in
        -h|--help)
            show_usage
            exit 0
            ;;
        -r|--root-user)
            ROOT_USER="$2"
            shift 2
            ;;
        -s|--socket)
            SOCKET="$2"
            shift 2
            ;;
        -H|--host)
            HOST="$2"
            shift 2
            ;;
        -P|--port)
            PORT="$2"
            shift 2
            ;;
        --drop-if-exists)
            DROP_IF_EXISTS=true
            shift
            ;;
        --dry-run)
            DRY_RUN=true
            shift
            ;;
        -*)
            print_error "Unknown option: $1"
            show_usage
            exit 1
            ;;
        *)
            if [[ -z "${USERNAME:-}" ]]; then
                USERNAME="$1"
            elif [[ -z "${PASSWORD:-}" ]]; then
                PASSWORD="$1"
            else
                print_error "Too many arguments"
                show_usage
                exit 1
            fi
            shift
            ;;
    esac
done

# Check if required parameters are provided
if [[ -z "${USERNAME:-}" ]]; then
    print_error "Username is required"
    show_usage
    exit 1
fi

if [[ -z "${PASSWORD:-}" ]]; then
    print_error "Password is required"
    show_usage
    exit 1
fi

# Validate username (basic validation)
if [[ ! "$USERNAME" =~ ^[a-zA-Z0-9_]+$ ]]; then
    print_error "Username must contain only alphanumeric characters and underscores"
    exit 1
fi

# Validate password length
if [[ ${#PASSWORD} -lt 6 ]]; then
    print_warning "Password is less than 6 characters. Consider using a stronger password."
fi

print_header "MySQL Backup User Creation Script"
echo "Username: $USERNAME"
echo "Host: $HOST"
echo "Port: $PORT"
echo "Drop if exists: $DROP_IF_EXISTS"
echo "Dry run: $DRY_RUN"
echo ""

# Create temporary SQL file
TEMP_SQL=$(mktemp /tmp/mysql_user_XXXXXX.sql)
trap "rm -f $TEMP_SQL" EXIT

# Generate SQL commands
cat > "$TEMP_SQL" << EOF
-- MySQL Backup User Creation Script
-- Generated on $(date)
-- Username: $USERNAME

EOF

# Add drop commands if requested
if [[ "$DROP_IF_EXISTS" == true ]]; then
    cat >> "$TEMP_SQL" << EOF
-- Drop existing user if it exists
DROP USER IF EXISTS '$USERNAME'@'%';

EOF
fi

# Add user creation and privilege grants
cat >> "$TEMP_SQL" << EOF
-- Create user for all host connections (%)
CREATE USER '$USERNAME'@'%' IDENTIFIED WITH caching_sha2_password BY '$PASSWORD';

-- Grant all necessary backup privileges
GRANT SELECT ON *.* TO '$USERNAME'@'%';
GRANT INSERT ON *.* TO '$USERNAME'@'%';
GRANT UPDATE ON *.* TO '$USERNAME'@'%';
GRANT DELETE ON *.* TO '$USERNAME'@'%';
GRANT CREATE ON *.* TO '$USERNAME'@'%';
GRANT RELOAD ON *.* TO '$USERNAME'@'%';
GRANT PROCESS ON *.* TO '$USERNAME'@'%';
GRANT LOCK TABLES ON *.* TO '$USERNAME'@'%';
GRANT BACKUP_ADMIN ON *.* TO '$USERNAME'@'%';
GRANT ALTER ON *.* TO '$USERNAME'@'%';
GRANT SHOW VIEW ON *.* TO '$USERNAME'@'%';
GRANT SHUTDOWN ON *.* TO '$USERNAME'@'%';

-- Flush privileges to ensure changes take effect
FLUSH PRIVILEGES;

-- Verify user creation
SELECT 'User created successfully:' as Status;
SELECT user, host FROM mysql.user WHERE user = '$USERNAME';
EOF

# Show SQL commands if dry run
if [[ "$DRY_RUN" == true ]]; then
    print_header "SQL Commands (Dry Run Mode):"
    cat "$TEMP_SQL"
    print_status "Dry run completed. No changes were made to the database."
    exit 0
fi

# Function to execute SQL
execute_sql() {
    local connection_method="$1"

    print_status "Connecting to MySQL using $connection_method..."

    if [[ "$connection_method" == "socket" ]]; then
        mysql -u "$ROOT_USER" -p --socket="$SOCKET" < "$TEMP_SQL"
    else
        mysql -u "$ROOT_USER" -p -h "$HOST" -P "$PORT" < "$TEMP_SQL"
    fi
}

# Try to connect and execute SQL
print_status "Creating backup user '$USERNAME'..."

# For MySQL, prefer TCP connection to match % host pattern
if execute_sql "tcp"; then
    print_status "Successfully connected via TCP"
else
    print_warning "TCP connection failed, trying socket..."
    if [[ -S "$SOCKET" ]]; then
        execute_sql "socket"
    else
        print_error "Both TCP and socket connections failed"
        exit 1
    fi
fi

print_status "Backup user '$USERNAME' created successfully!"
print_status "Testing connection..."

# Test the new user connection (use TCP to match % host)
if mysql -u "$USERNAME" -p"$PASSWORD" -h 127.0.0.1 -e "SELECT USER(), CONNECTION_ID();" 2>/dev/null; then
    print_status "User connection test successful!"
else
    print_warning "User connection test failed. Please verify manually."
fi

# Additional test for backup privileges
print_status "Testing backup privileges..."
if mysql -u "$USERNAME" -p"$PASSWORD" -h 127.0.0.1 -e "SHOW MASTER STATUS; SHOW DATABASES;" 2>/dev/null; then
    print_status "Backup privileges test successful!"
else
    print_warning "Some backup privileges may not be working. Please verify manually."
fi

print_header "Next Steps:"
echo "1. Test the backup user:"
echo "   mysql -u $USERNAME -p -h 127.0.0.1"
echo ""
echo "2. Use in backup scripts:"
echo "   mysqldump -u $USERNAME -p -h 127.0.0.1 --all-databases > backup.sql"
echo ""
echo "3. For Xtrabackup:"
echo "   xtrabackup --backup --user=$USERNAME --password=PASSWORD --target-dir=/backup/path"
echo ""
echo "4. Always use TCP connections (-h 127.0.0.1) to match the % host pattern"
echo ""
echo "5. Create PERCONA_SCHEMA if needed:"
echo "   mysql -u root -p -e \"CREATE DATABASE IF NOT EXISTS PERCONA_SCHEMA;\""
echo "   mysql -u root -p -e \"GRANT ALL PRIVILEGES ON PERCONA_SCHEMA.* TO '$USERNAME'@'%';\""

print_header "Security Reminder:"
echo "- This user has powerful privileges including SHUTDOWN and BACKUP_ADMIN"
echo "- Use strong passwords and restrict network access where possible"
echo "- Consider creating application-specific users with limited privileges"

print_status "Script completed successfully!"