Deploy XLServer on VirtualBox
This guide walks you through the deployment of XLServer on Oracle VirtualBox, using the pre-packaged OVA file. This is the recommended method to quickly set up and test the product in a non-production environment.
✅ VirtualBox is suitable for testing or evaluation. For production, consider Deploying XLServer on VMware.
Step 1 – Launch VirtualBox and Import the OVA
- Open VirtualBox Manager.
- Go to File > Import Appliance.
- Select the
xlserver-virtualbox.ovafile you downloaded.
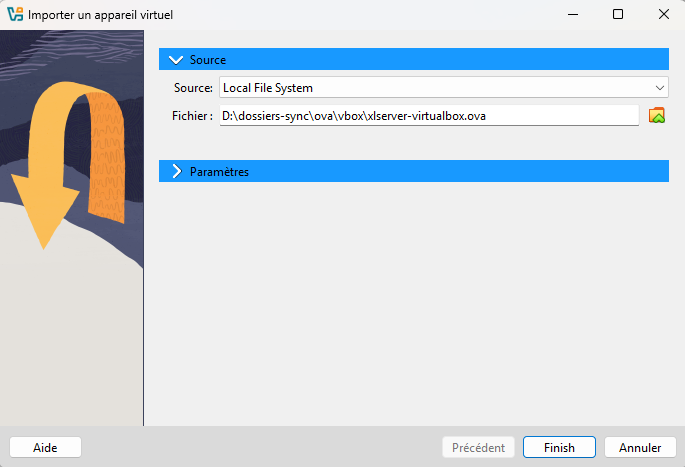
- Click on link Parameters in order to expand parameters section.
Step 2 – Configure Virtual Machine Name
-
In the "Appliance Settings" screen, rename the virtual machine to something like
xlserver. -
Select the virtual machine base folder from Machine Base Folder.
-
Choose Generate new MAC address for all network interfaces from MAC address policy.
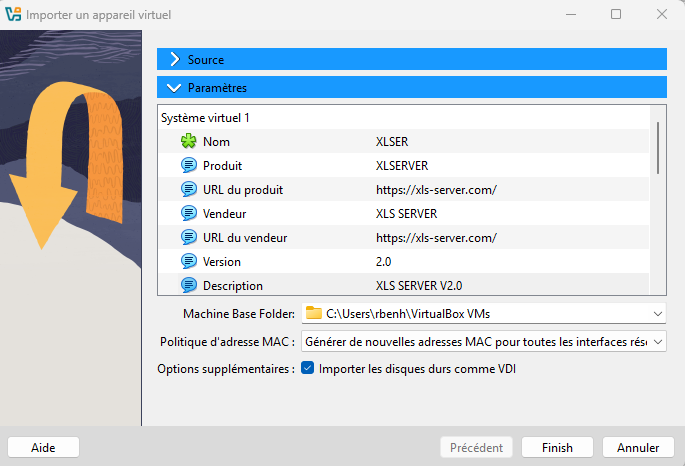
- Click Finish to proceed with import. You will be prompted to accept the terms of the license agreement.
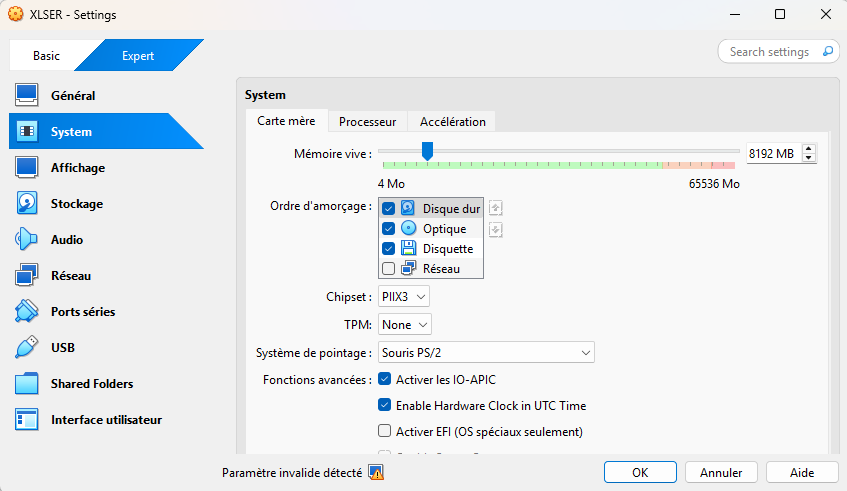
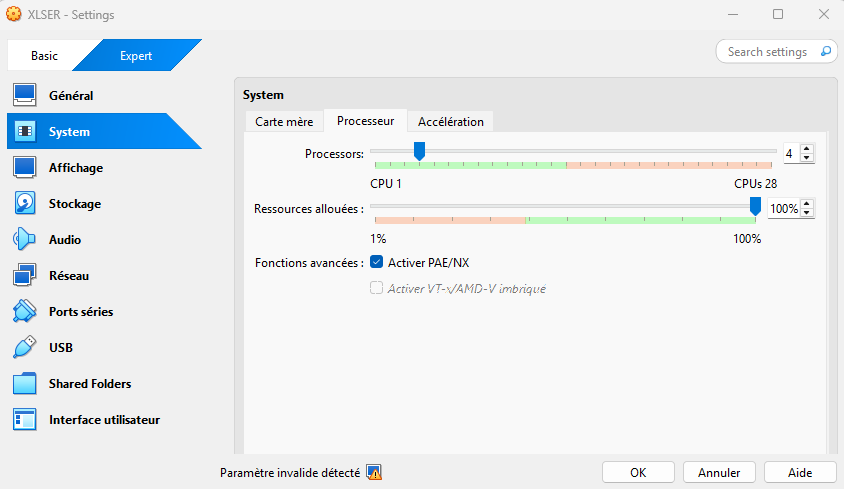
Step 3 – Adjust CPU and Memory
After import completes:
- Open the VM Settings.
- Navigate to System > Motherboard and Processor tabs.
Recommended configuration:
- Standard/Professional Edition: 8 vCPU and 32 GB RAM
- Enterprise Edition: 16 vCPU and 64 GB RAM
Step 4 – Configure Network Adapter(s)
-
In Settings > Network, ensure at least one adapter is enabled and attached to Bridged Adapter or NAT.
-
You can configure up to three adapters for:
- Management network
- Backup network
- Client network
Use Intel PRO/1000 MT Server or Paravirtualized Network (virtio-net) if supported.
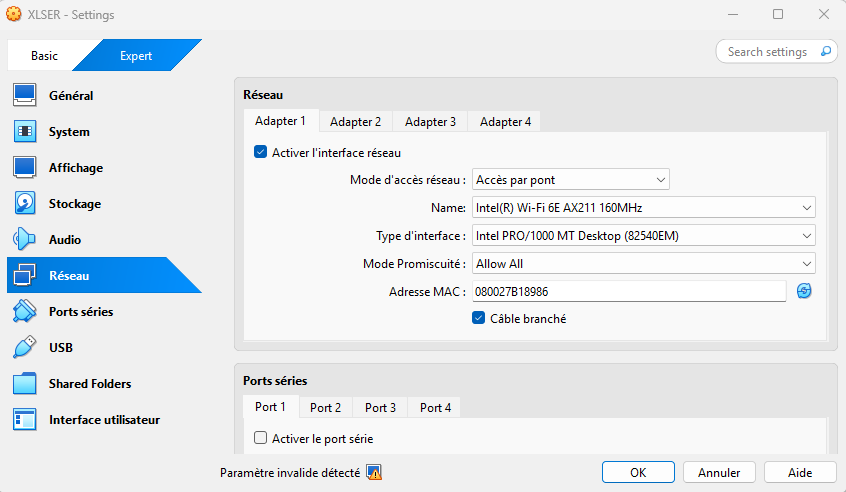
⚠️ If it is not done during the import, you should generate new MAC address for the adapter.
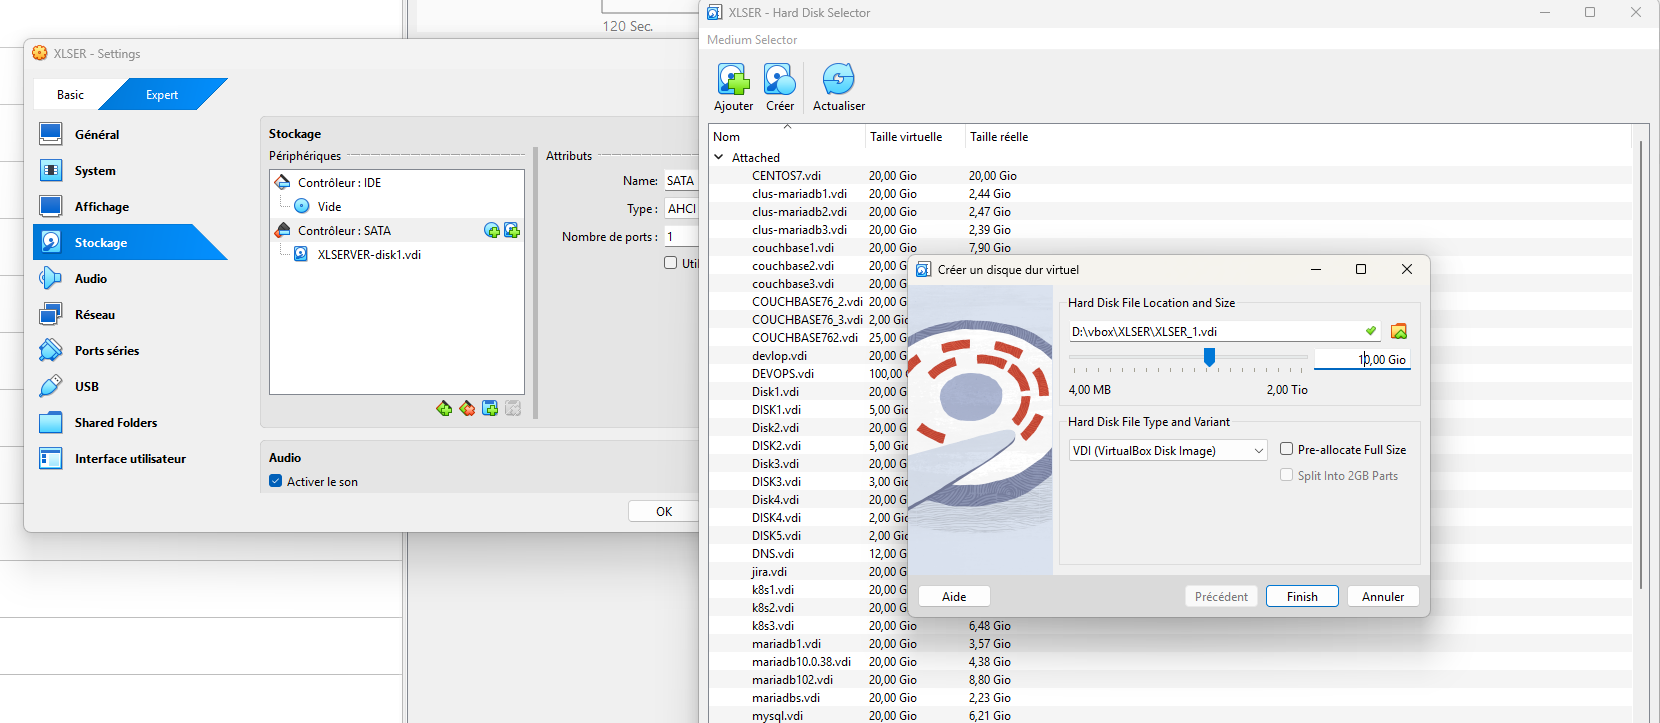
Step 5 – Add Disks for Datastore and Optional Devices
XLServer needs additional virtual disks for storing data.
- Go to Settings > Storage.
- Add one or more SATA or SCSI virtual disks for:
- Datastore (required)
- SLOG (optional)
- Cache (L2ARC) (optional)
Recommendations:
- Datastore: Based on database size and retention policy (see System Requirements)
- SLOG: Use fast SSD or NVMe for better ZFS write performance
- Cache: Optionally add 10–20% of datastore size for L2ARC
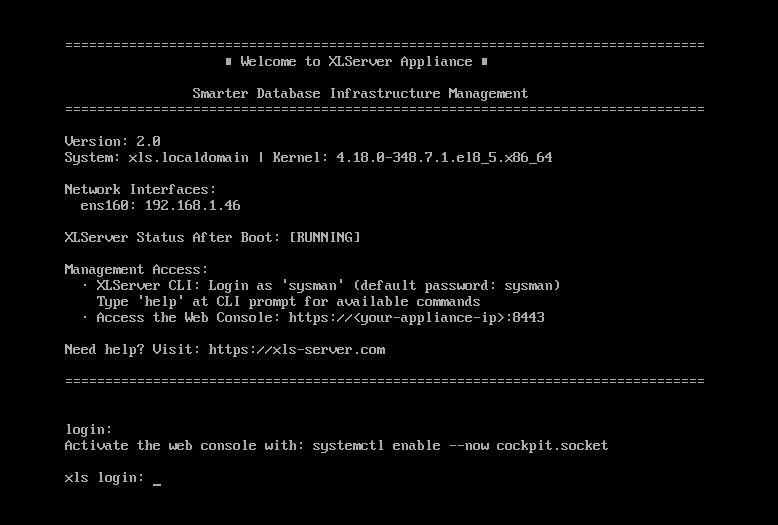
Step 6 – Start the Virtual Machine
Click Start to launch the virtual machine.
- Wait for the system to boot.
- The default IP address will be displayed in the console once the system is ready.
📌 This IP address will be used to access the web interface or CLI for first-time configuration.
Notes: VirtualBox vs VMware
| Feature | VirtualBox | VMware Workstation / ESXi |
|---|---|---|
| Import method | File > Import Appliance | Deploy OVF Template |
| NIC options | Intel/Paravirtualized | VMXNET3 |
| Disk addition | Manual after import | During or after deployment |
| Resource tuning | Limited | More granular (ESXi) |
| Production readiness | ⚠️ Testing only | ✅ Recommended |
ℹ️ After deployment, continue with the next step: First-Time Configuration