User Management
By default, ADMIN is the only built-in Administrator user in XLServer.
This user should be reserved for administrative tasks only.
For day-to-day operations and managing project-specific objects, it is strongly recommended to create dedicated standard users for each team.
User Types
In XLServer, there are two types of users:
-
Administrator Users
- Have unrestricted access to all features and objects in XLServer.
- No privileges assignment is required.
-
Standard Users
- Work with permissions.
- Permissions can be either system privileges or project-based privileges.
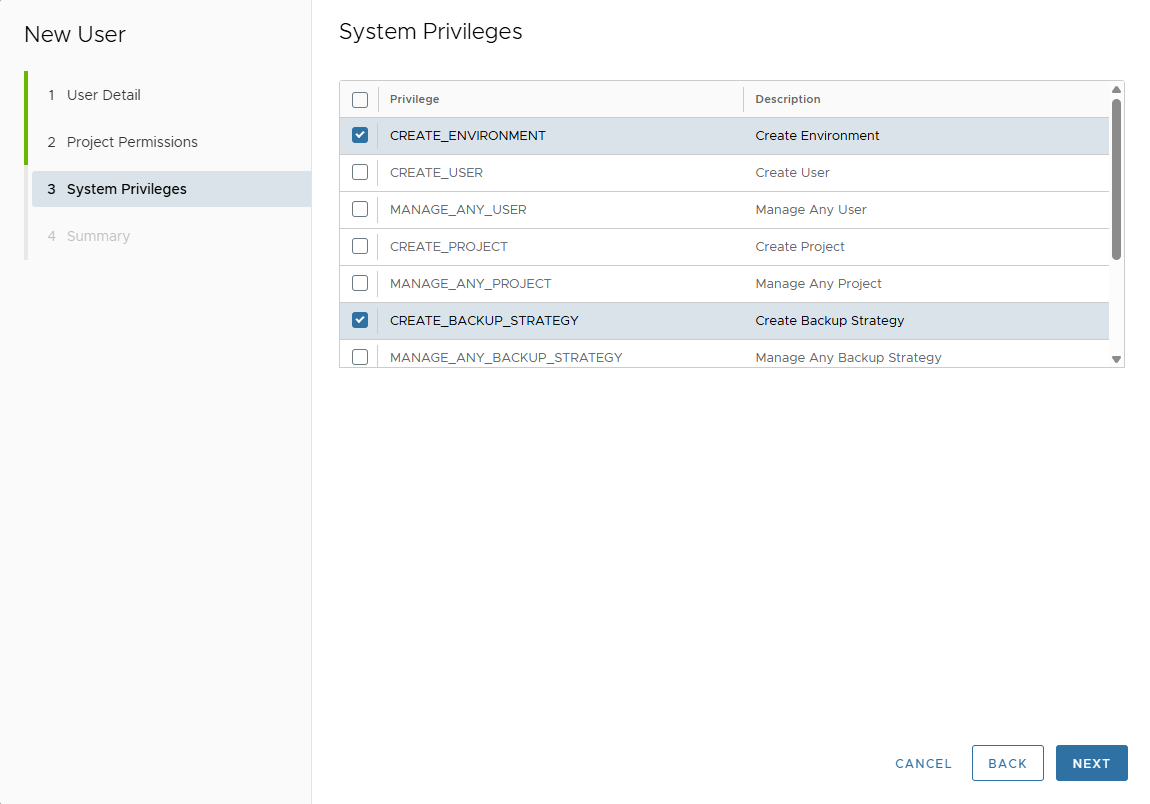
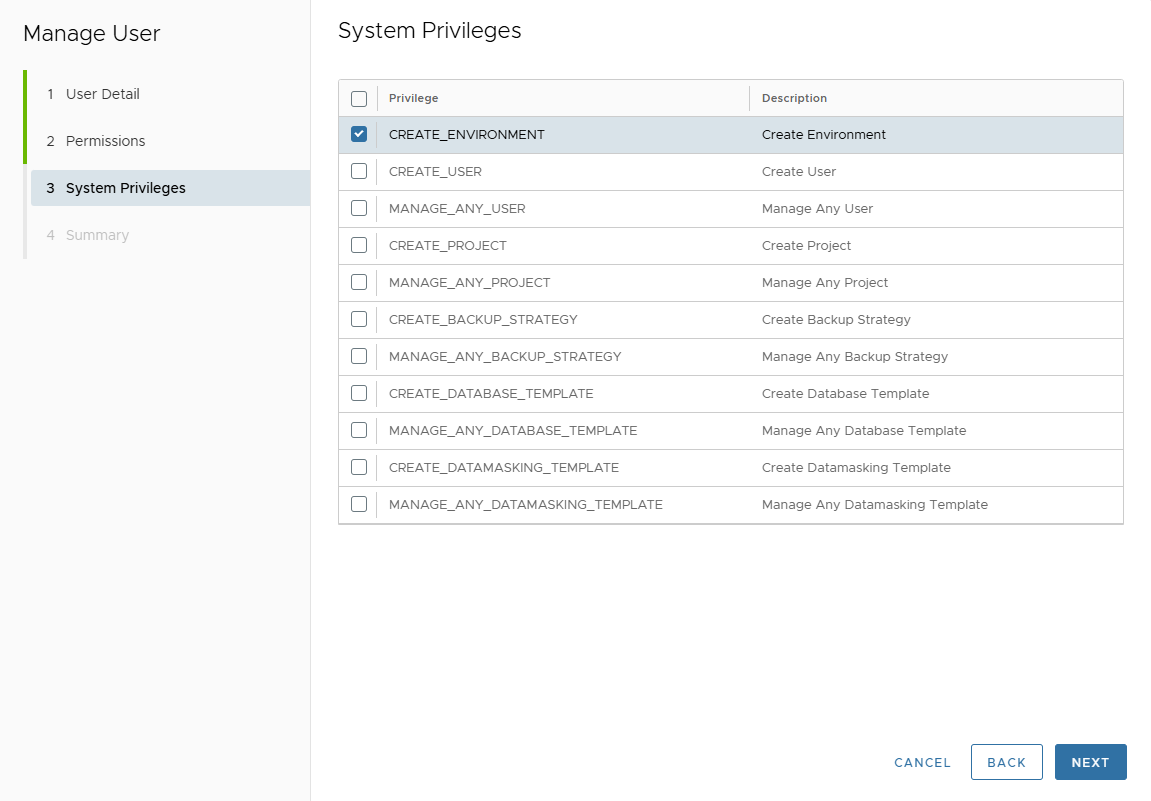
System Privileges
System privileges give users the ability to execute platform-wide administrative tasks.
| Privilege Name | Privilege Description |
|---|---|
| CREATE_ENVIRONMENT | Create Environment |
| CREATE_USER | Create User |
| MANAGE_ANY_USER | Manage Any User |
| CREATE_PROJECT | Create Project |
| MANAGE_ANY_PROJECT | Manage Any Project |
| CREATE_BACKUP_STRATEGY | Create Backup Strategy |
| MANAGE_ANY_BACKUP_STRATEGY | Manage Any Backup Strategy |
| CREATE_DATABASE_TEMPLATE | Create Database Template |
| MANAGE_ANY_DATABASE_TEMPLATE | Manage Any Database Template |
| CREATE_DATAMASKING_TEMPLATE | Create Datamasking Template |
| MANAGE_ANY_DATAMASKING_TEMPLATE | Manage Any Datamasking Template |
View All Users
Navigate to:
System > Users

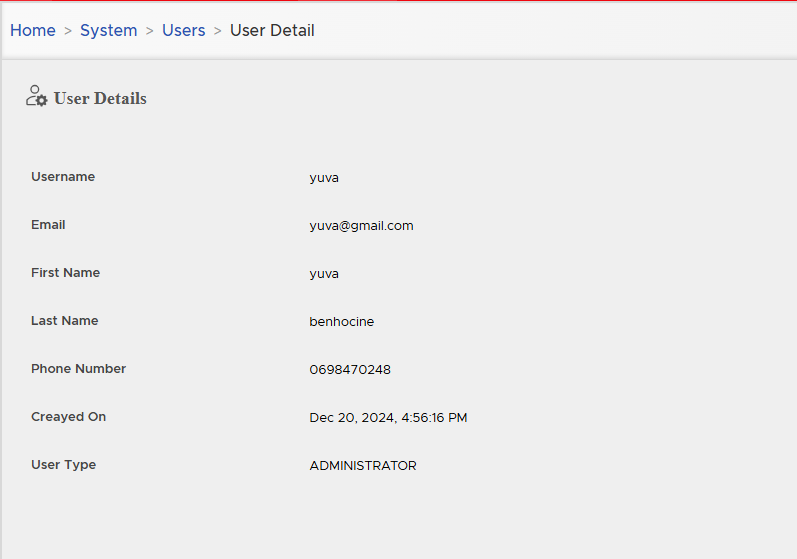
View User Detail
To view the details of a specific user:
- Click on the eye icon near the user entry.
- The detail page will display user information and privileges.
Create User
To create a new user:
- Go to System > Users page.
- Click on the button CREATE NEW USER.
- The User Creation Wizard will appear.
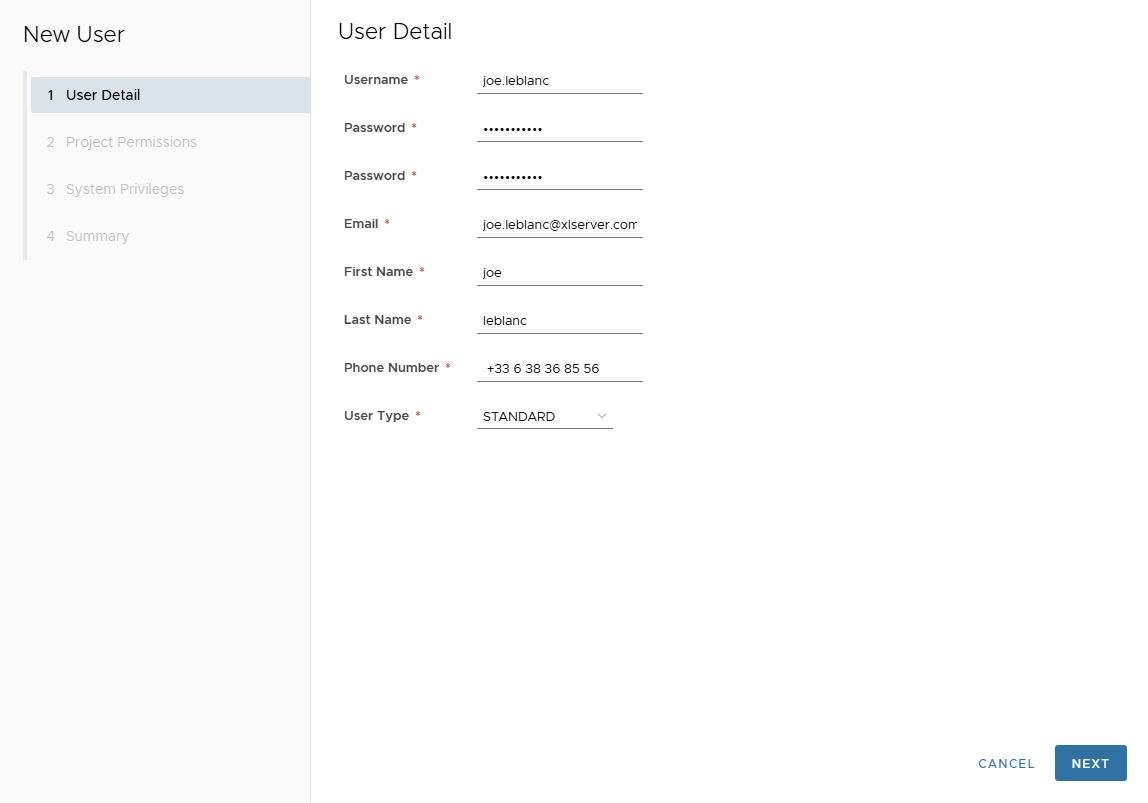
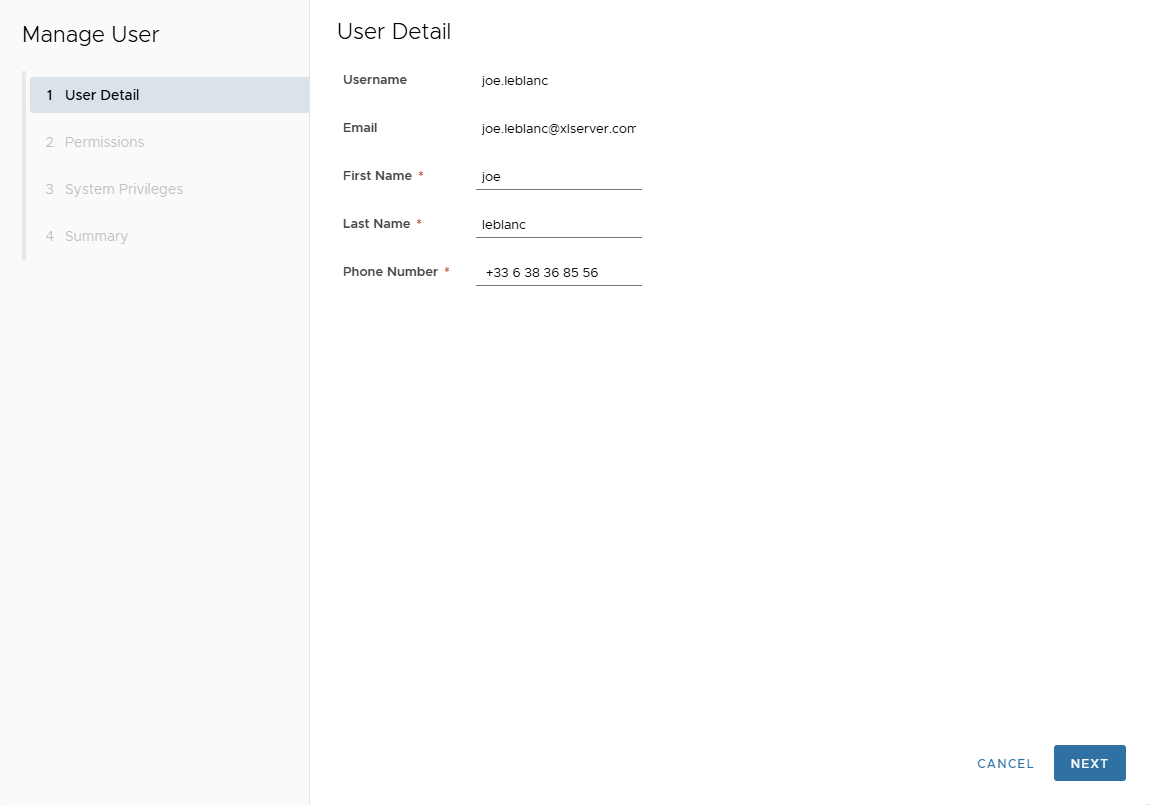
Step 1: User Detail
Fill in the following fields:
- Username
- Password
- Confirm Password
- First Name
- Last Name
- Phone Number
- User Type (Administrator or Standard)
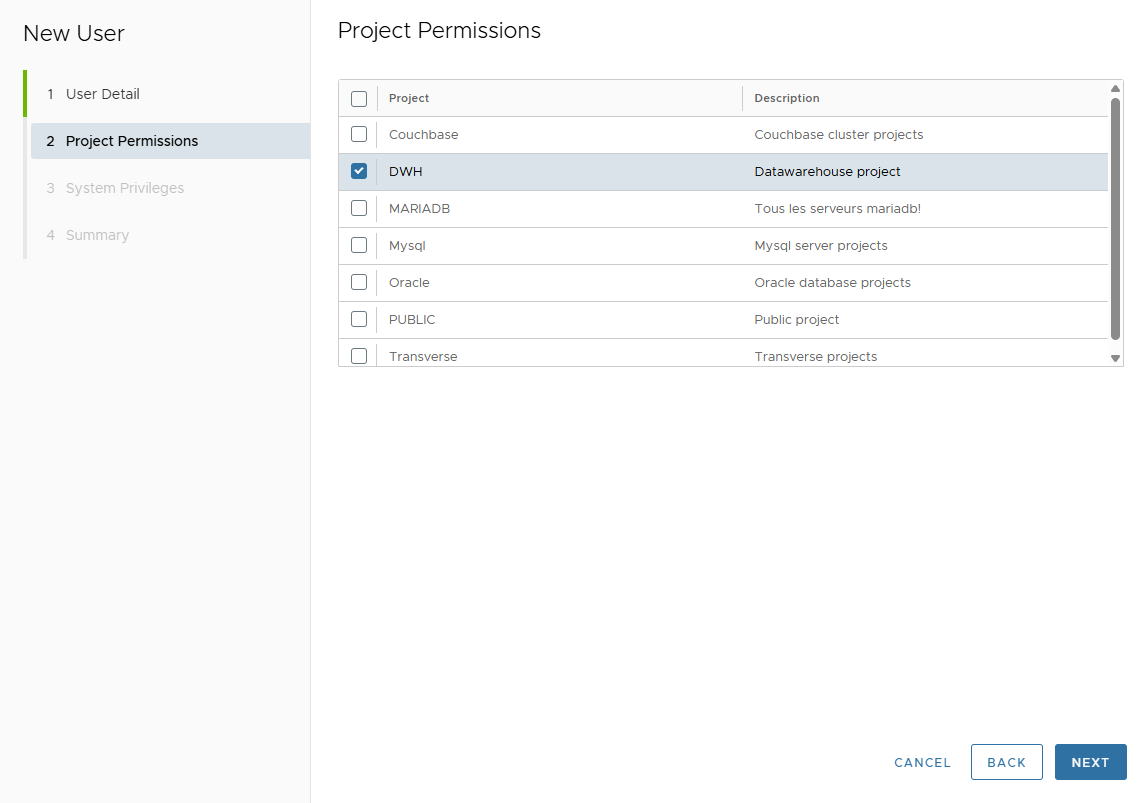
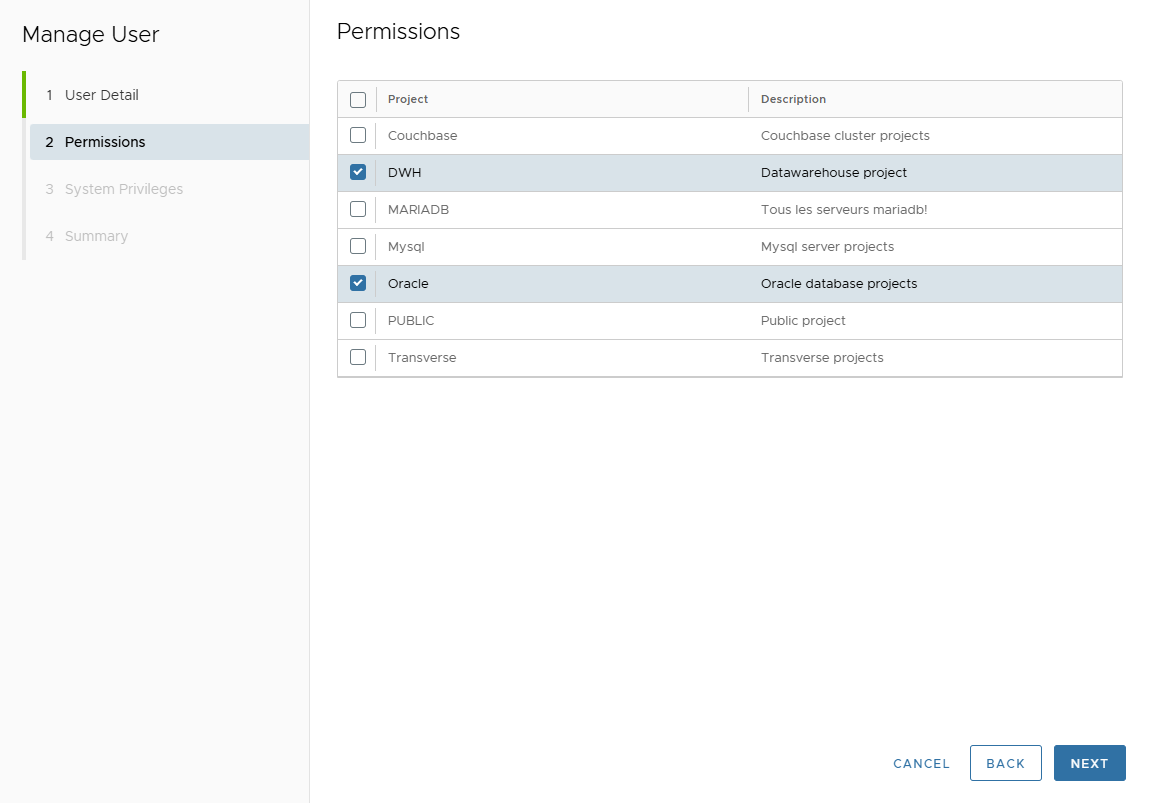
Step 2: Project Permissions
If the user type is Standard, assign project access.
By default, the user has access to the PUBLIC project, even if not explicitly selected.
Step 3: System Privileges
If the user type is Standard, select the system privileges to assign.
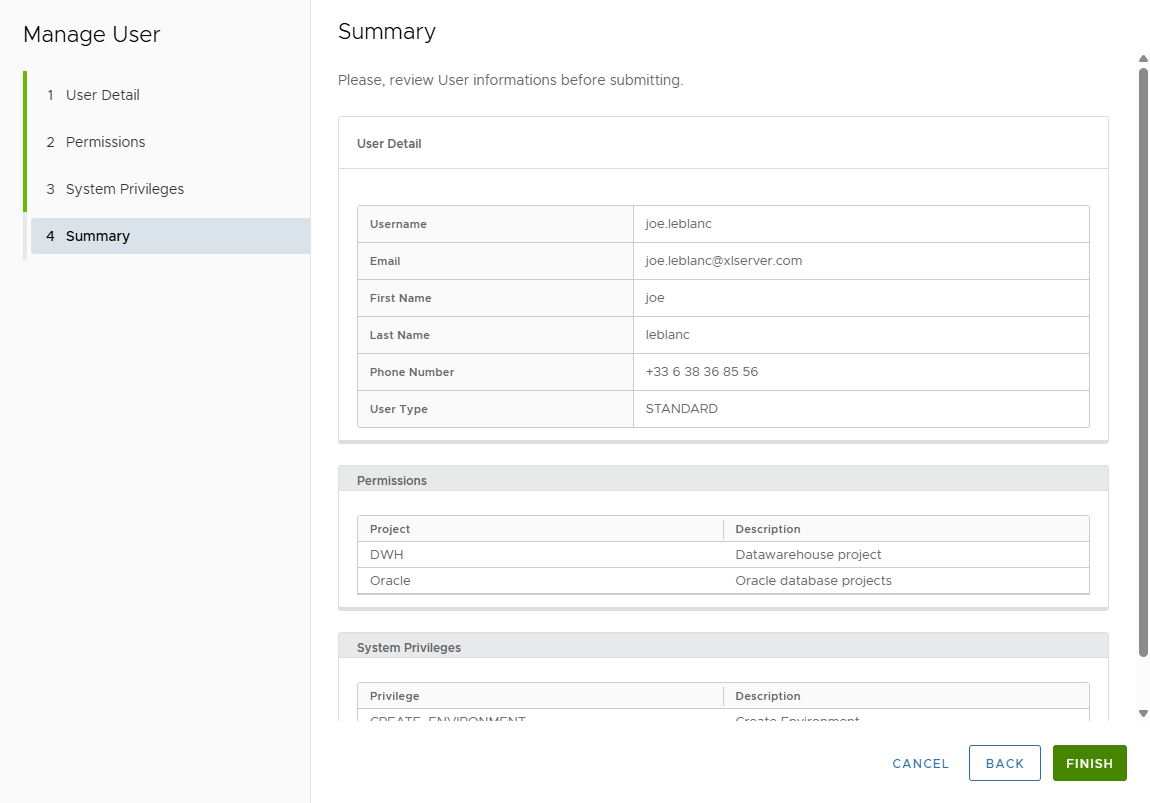
Step 4: Summary
Review all entered details.
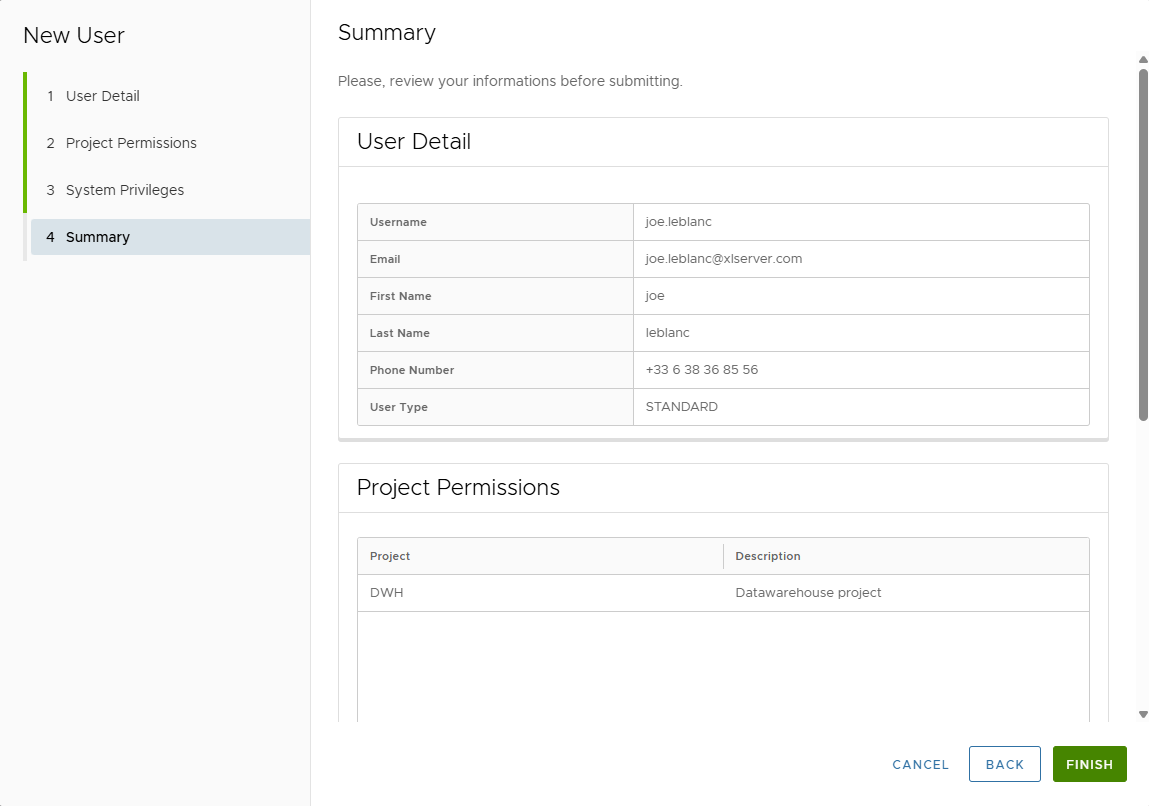
Click FINISH to create the user.
Edit User
To edit an existing user:
- Go to System > Users.
- Click on the pencil icon near the user.
- The User Wizard appears.
Step 1: Properties
Modify any user properties except username and email.
Step 2: Project Permissions
Modify project access by selecting or deselecting projects.
Step 3: System Privileges
Change the user’s system privileges.
Step 4: Summary
Review and validate the changes.
Click FINISH to confirm.
⚠️ Note: The default user ADMIN cannot be edited.
Delete User
To delete a user:
- Click on the trash icon near the user.
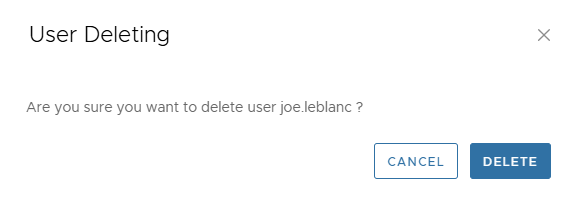
- Click DELETE to confirm or CANCEL to abort.
⚠️ Important:
You cannot delete a user who already owns objects in XLServer.
All associated objects must be deleted or reassigned before deleting the user.